 TreiD
TreiD
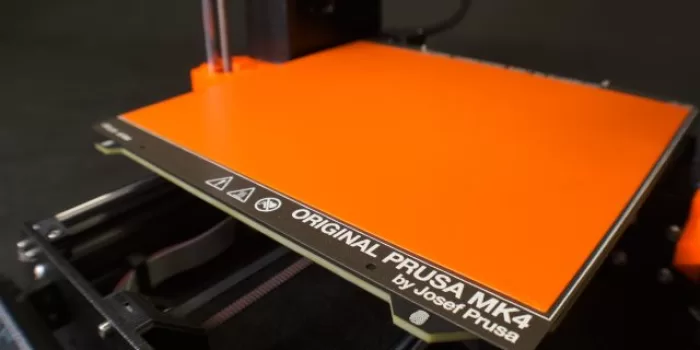
First layer troubleshooting usually goes wrong because people fix things in the wrong order. They re-level a bed for an hour when the real problem was a thumbprint on the plate. I use one fixed sequence instead. The cheapest and most common cause comes first, invasive hardware comes last, and every step ends in a pass or a fail.
One rule makes it work: you move to the next step only when the current one passes. The order is: read the failed layer, clean the plate, set Z offset, check leveling and the mesh, match temperature, speed and cooling, rule out the plate surface and filament, and only then touch hardware. Change three things at once and you’ve learned nothing, even if the print sticks. Step 0 costs nothing, because it’s reading the layer that already failed.
First Layer Troubleshooting Step 0: Read the Failed Layer Before You Touch Anything
Don’t scrape that failed layer into the bin yet. It tells you more about first layer troubleshooting than any forum thread. I look at three things: the shape of the lines, where on the plate it failed, and when in the layer it let go.
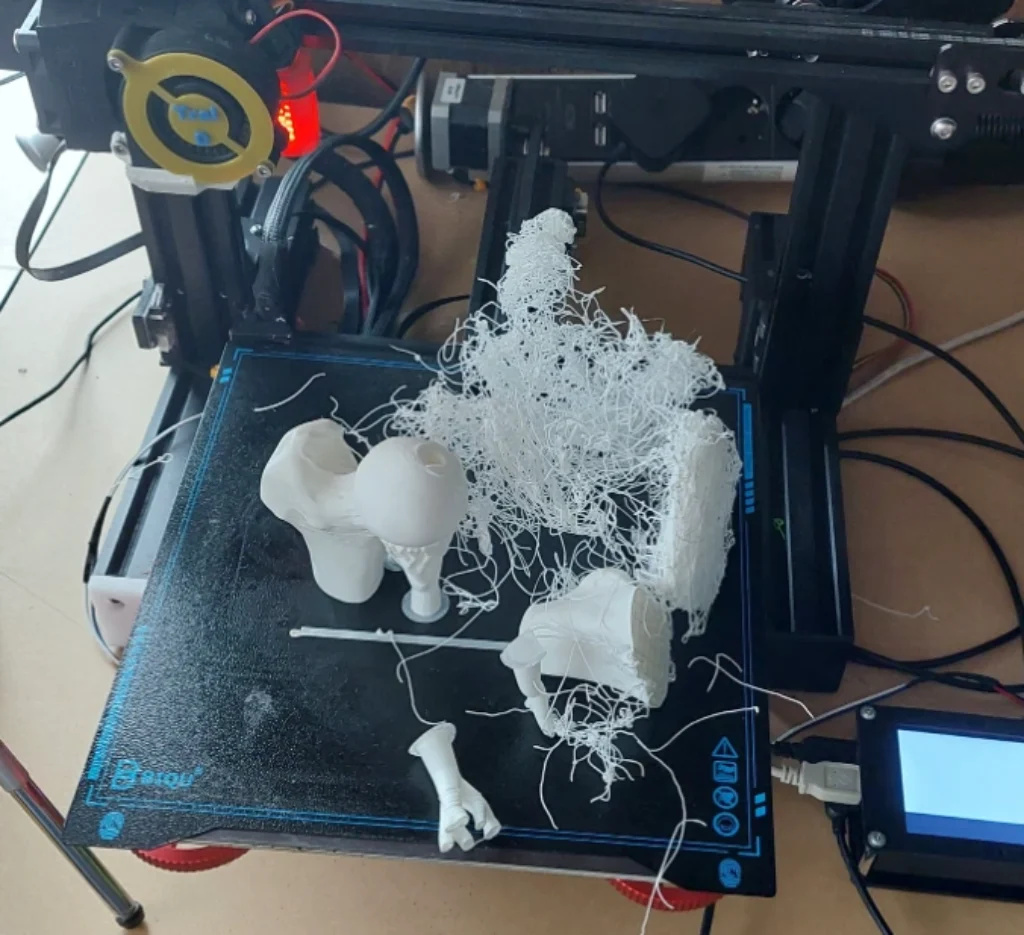
Line shape comes first. As a working rule, round lines lying side by side with gaps between them suggest the nozzle is too high or the plastic isn’t wetting the surface. Thin, see-through lines with ridges between them, or a nozzle that scrapes, suggest it’s too low.
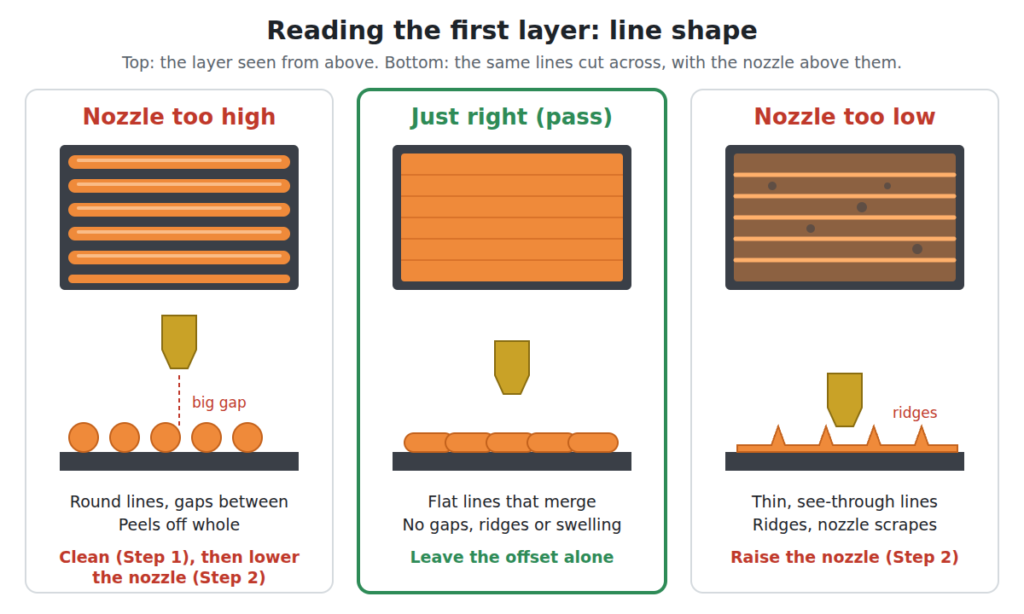
Torn lines are the tricky ones. If a line goes down and then drags or rips, the plastic stuck to the nozzle better than to the plate. That points at contamination or a nozzle that’s far too low. Either way it’s Step 1 or Step 2, never leveling.
Location comes next. A failure everywhere is a whole-plate problem: cleanliness, Z offset or temperature. A failure in one corner or along one edge, with a perfect middle, is a geometry problem. That’s the only case where I jump straight to leveling in Step 3.
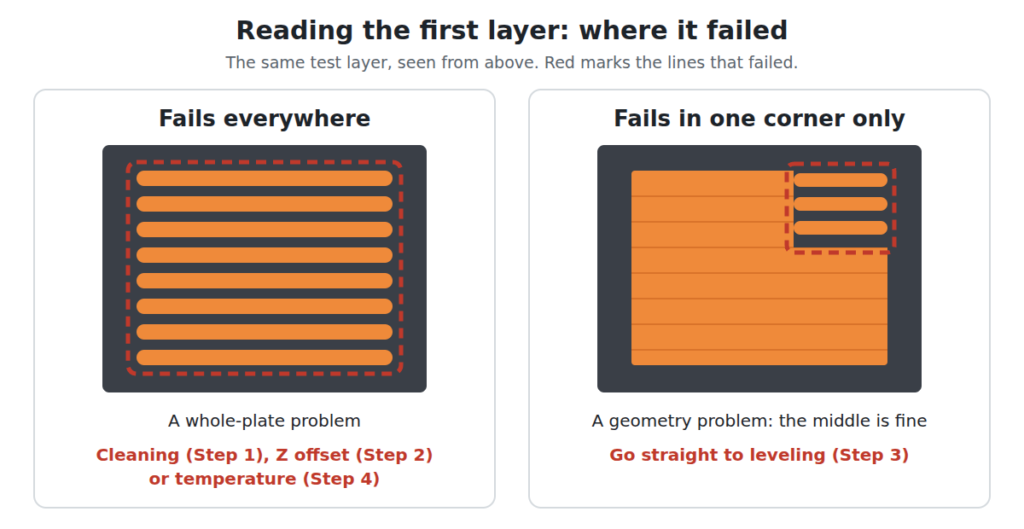
Then timing. If the skirt or the very first line won’t stay down, the plate or the offset is at fault. If the layer goes down fine and the corners curl up a few minutes later as it cools, that’s temperature and cooling, which is Step 4. The side-by-side diagram in Step 4 shows both.
So what does a pass look like? Ultimaker’s UM2 user manual puts it plainly: the first layer should be nicely squished into the plate and stick well to it. Too big a gap and the print won’t stick; too small and the nozzle can stop the filament coming out. So my pass test for every step below is lines pressed flat enough to merge with their neighbours, with no gaps, no ridges and no swelling.
Step 1: Clean the Build Plate Properly (the Cheapest Check)
Cleaning goes first in first layer troubleshooting because it’s the cheapest check and the one I’d bet on. For prints without glue, Ultimaker’s manual wants the glass plate completely free of dust and oil, because plastic won’t stick well to a greasy surface. Prusa’s first-layer guide also starts with preparing the print surface, before it gets to nozzle height.
So clean the plate until no dust or oil is left on it, rather than giving it a quick wipe. Prusa’s guide splits this into two jobs: 90% isopropyl alcohol as the everyday degreaser, and dish soap and water when adhesion still drops, with the sheet dried well afterwards. On its textured and satin sheets, it says never to use acetone.
The soap-and-water wash is the one I lean on. My P1S fails about 5% of its prints, mostly on adhesion, because grease from my hands gets on the bed, so I wash it with soap and warm water. After cleaning, handle the plate by the edges only, because one careless grab before the print puts grease back where the first layer goes.
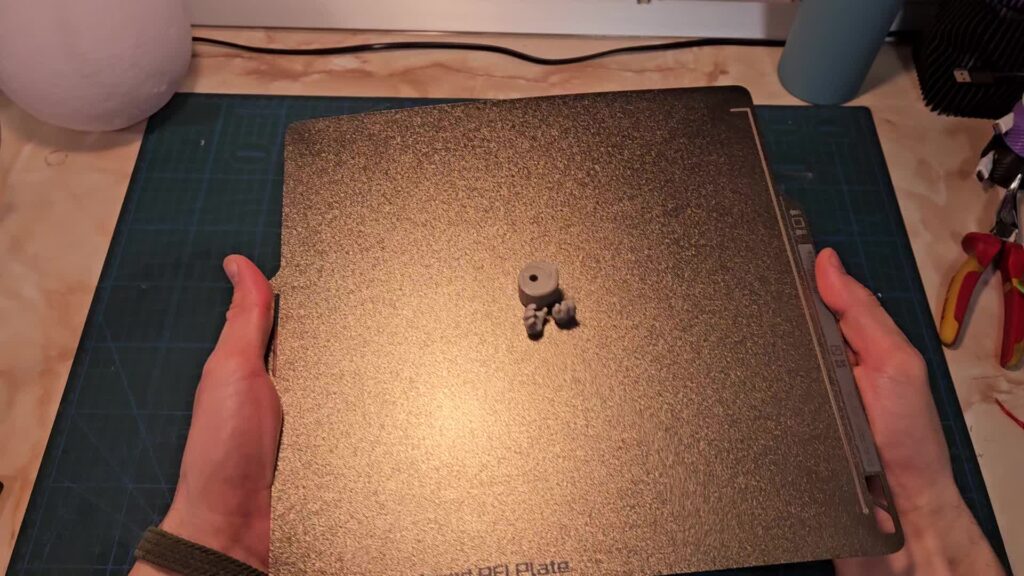
Pass or fail: wash, dry, and print the same first layer again without changing any setting. If it now goes down even and closed, you’re done, and you’ve skipped an hour of re-leveling. If it still fails the same way, the plate is ruled out and you move to Step 2.
Step 2: Set Z Offset Until the First Layer Squish Looks Right
Once the plate is clean, check the gap between nozzle and plate. Prusa’s guide sets it with Live Adjust Z and its First Layer Calibration. It also warns against making up for poor adhesion with a lower Live Adjust Z, because a nozzle lowered too far can damage the steel sheet. That warning is why this is Step 2 and not Step 1: skip the cleaning and you’ll keep dropping the nozzle to force plastic onto grease.
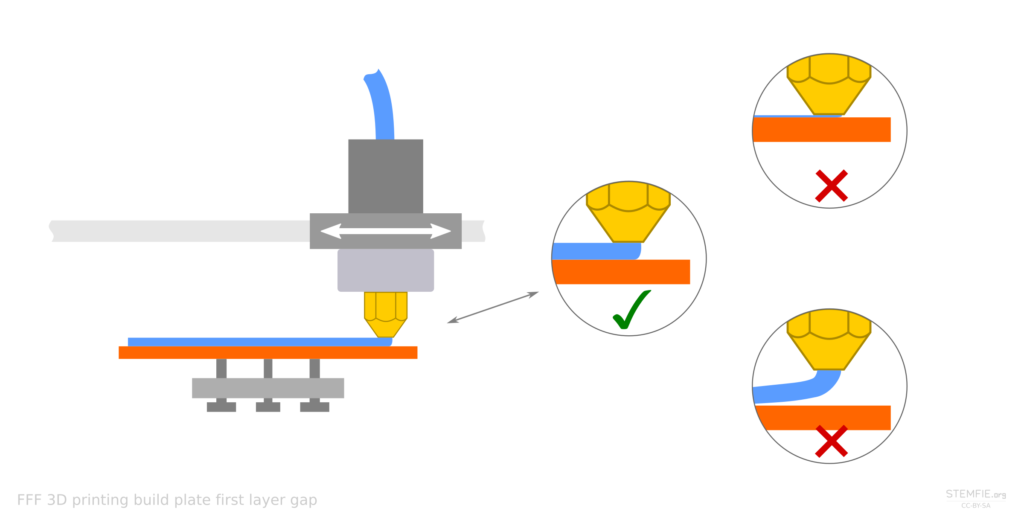
Adjust in small steps while the first layer prints, using Live Adjust Z or your printer’s equivalent, and watch the lines rather than the number. Round lines with gaps between them: bring the nozzle down. Thin, transparent lines with ridges, or plastic piling up beside the nozzle: bring it up. Aim for the point where the lines just merge into one flat sheet.
In the video above, The 3D Printing Zone shows how to judge a first layer and adjust it on the fly while it prints.
If you’ve just swapped the plate or the nozzle, recheck the offset before anything else. A different plate thickness or nozzle length moves the gap, even when nothing else changed.
Pass or fail: the layer meets the even, closed, no-swelling standard across the middle of the plate. If the middle is good but a corner isn’t, the offset passed and the bed geometry didn’t, so go to Step 3. If the whole layer still won’t hold at a squish that looks right, stop lowering the nozzle and go to Step 4.
Step 3: Check Bed Leveling and the Mesh When Only Some Areas Fail
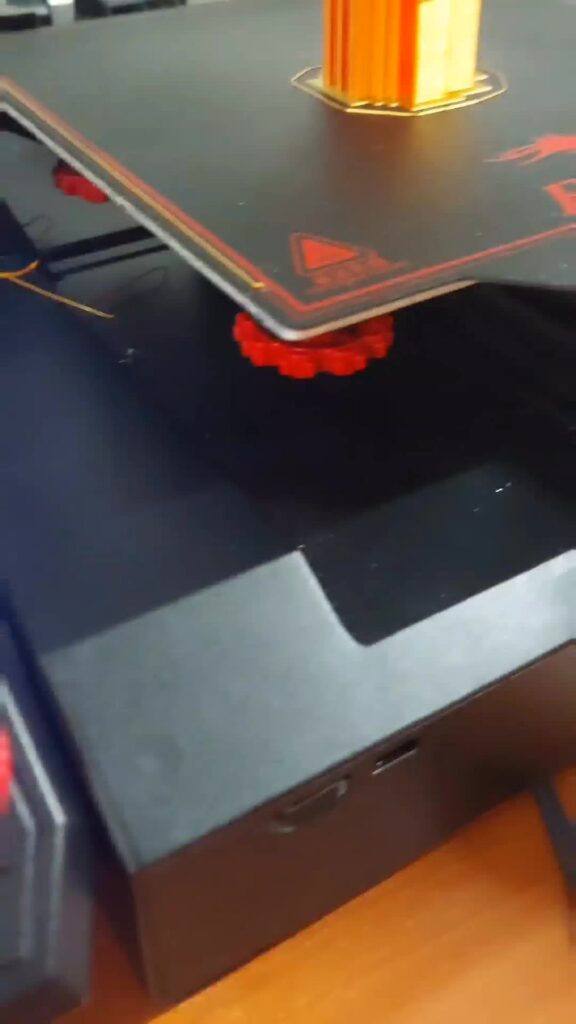
Leveling is the fix most people reach for first. I put it third, because it only explains failures that happen in one place. If one corner is round and gappy while the opposite corner is scraped thin, the plate isn’t parallel to the nozzle’s path, or the mesh isn’t measuring it correctly. Cleaning and offset can’t fix that kind of fault.
A simple test is a single layer of five small squares: one in each corner and one in the middle. On a manual bed, adjust the knob nearest the bad square, read the lines as round or thin like before, and reprint. On a printer with a probe, rerun the mesh first. If the same corner keeps failing after a fresh mesh, suspect the probe or the bed itself, not the leveling.
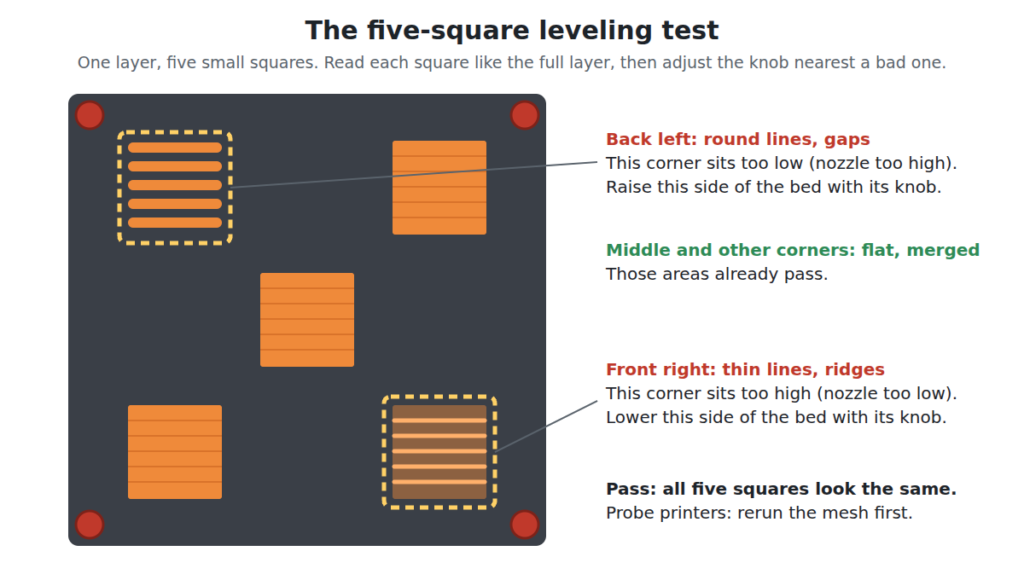
Don’t expect a manual bed to stay put. Recheck it whenever a corner that used to pass starts failing.
Pass or fail: all five squares look the same. Once they do, leveling is ruled out. If the full first layer still fails, the cause affects the whole plate, and that’s Step 4.
Step 4: Match Bed Temperature, First Layer Speed and Cooling to the Filament
If the layer goes down well and then lets go, especially at the corners or partway through, check temperature next. Ultimaker’s manual explains why: plastic shrinks as it cools, and that can curl a print up at the corners, most of all with ABS. Start from the material’s recommended nozzle and bed temperatures, as Prusa advises, and if the material still won’t hold, its first-layer guide suggests raising the heatbed by 5–10 °C. For reference, the same manual sets its own glass bed to 60 °C for PLA and 90 °C for ABS, and adds glue or a brim when ABS warps.
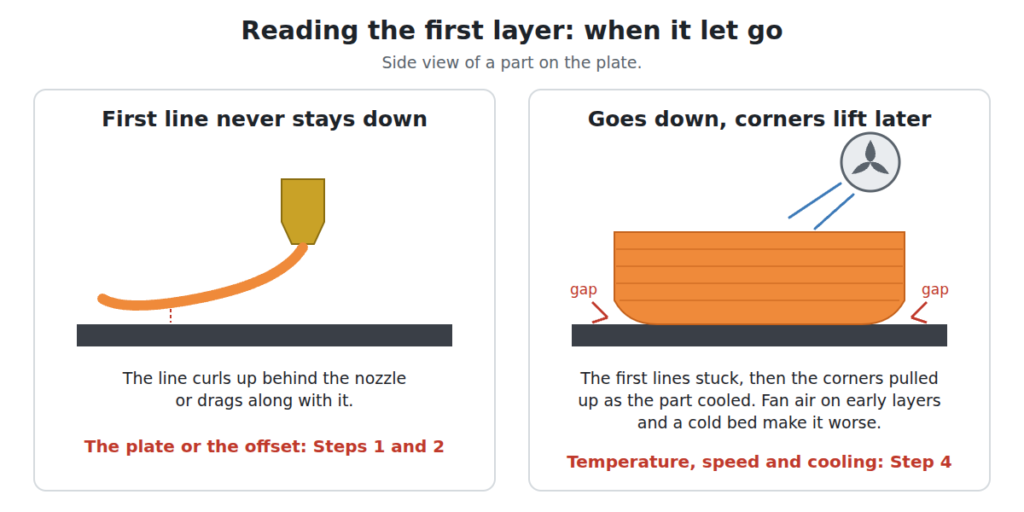
Speed and cooling belong to the same step, and a copied profile is the usual culprit. Prusa’s guide suggests slowing to about 75% for the first three layers. Prusa’s cooling settings page says the first layer usually needs no cooling, and that keeping the fan off for the first few layers, commonly 1 to 5, stops the print warping and detaching. In PrusaSlicer that’s First layer speed and Disable fan for the first N layers; in Cura, check Initial Layer Speed, Initial Fan Speed and Regular Fan Speed at Layer against the stock profile for your printer.
If you print ABS or ASA, also consider whether the part needs an enclosure; I’ve covered which ABS parts survive open air if that’s where you’re stuck.
Pass or fail: the corners stay down through the first layer and the next few. If raising the bed 5–10 °C above the filament’s recommended temperature still doesn’t hold them, go to Step 5.
Step 5: Rule Out the Plate Surface and the Filament
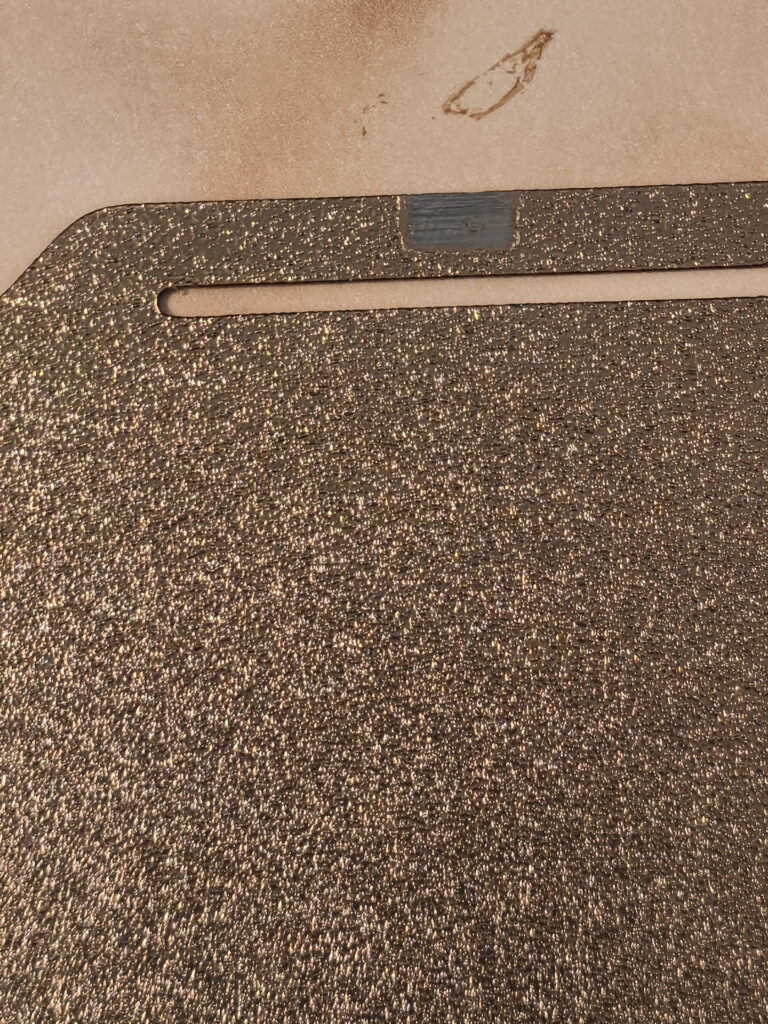
At this point the settings are right, so I look at the two consumables: the surface the plastic lands on and the plastic itself. Both wear out without much warning. A plate that worked for months can fail exactly where you’ve printed most, and a spool that printed fine in winter can misbehave after a humid summer.
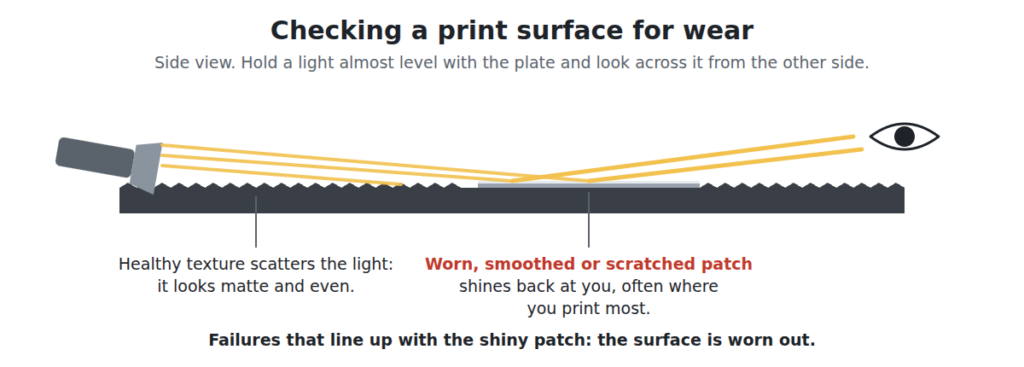
To check the surface, hold the plate under a light at a low angle. Shiny, smoothed or scratched patches show up straight away. If failures line up with those patches while the rest of the plate is fine, the surface is worn out.
For the filament, the cheapest test is a swap: print the same first layer with a known-good spool. If that one sticks, dry the suspect spool. Prusa’s drying guide says most FFF materials are hygroscopic, and for its Prusament lists 45 °C for 6 hours for PLA, 55 °C for 6 hours for PETG and 60 °C for 4–6 hours for TPU. Those values are for Prusament, so check your own spool’s label first, and don’t dry longer than you need: the guide warns against overdrying.
Pass or fail: either a fresh surface or a dry, known-good spool fixes it, or neither does. If PETG is giving you trouble, my PETG vs PLA comparison covers where each one belongs. If both consumables check out and the layer still fails, it’s time to open the toolbox.
Step 6: Hardware Faults When Every Setting Checks Out
Hardware comes last in first layer troubleshooting, and that’s on purpose. It’s the slowest, it means taking things apart, and it’s the rarest cause. You only get here when the plate is clean, the offset looks right, the five squares match, the temperatures suit the filament and the spool is known-good. If the layer still fails, a part is moving when it shouldn’t, or not moving when it should.
Start with the bed. Push it by hand: it shouldn’t rock or click on its wheels. Worn eccentric wheels show flat spots, cracks or a groove in the tread, often with dark dust on the rail, and tired springs sit shorter than new ones or let the knobs turn with almost no resistance, so the bed drifts after you level it. On my Ender 3 Pro I changed the V-wheels and swapped the bed springs for the yellow, sturdier ones, and on my Biqu B1 the wheels and belts were what wore over the years.
Next, the Z axis, because a binding or misaligned one won’t put the nozzle where the offset says it is. Disable the motors and move the axis by hand along its whole travel: it should feel equally smooth, with no tight spots, the lead screw should run straight and its coupler should be tight on the motor shaft. On dual-Z printers, measure the gantry height on both sides, because one low side tilts the whole first layer. When I assembled my Ender 3 Pro, getting the Z axis 100% aligned was the step that mattered most.
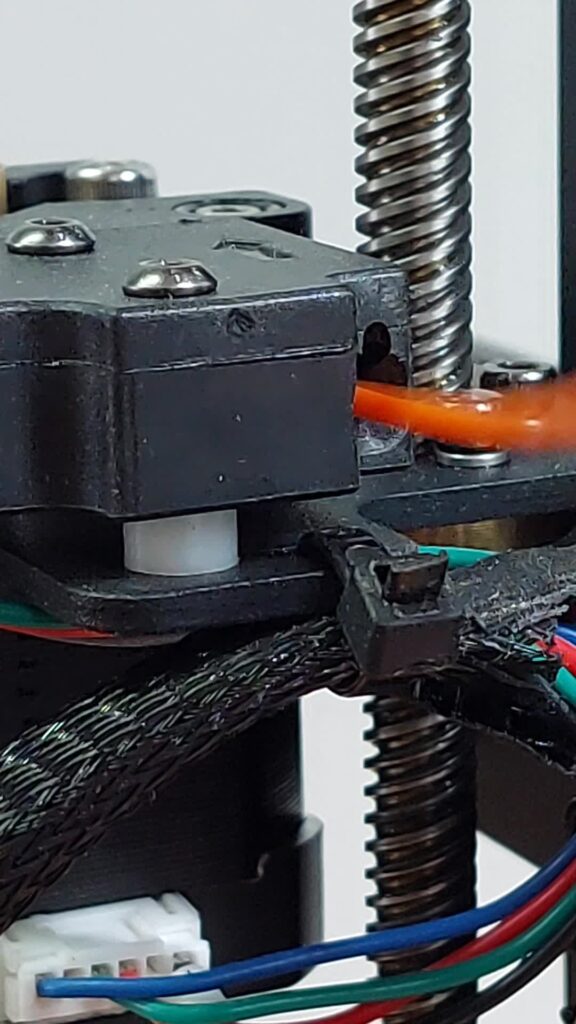
Then the extrusion side. A partial clog or a slipping extruder starves the first layer, and the result can look like a nozzle set too high. Ultimaker’s manual puts a check for filament ground down in the feeder near the top of its list for thin extrusion. Run through extruder calibration before you blame the bed.
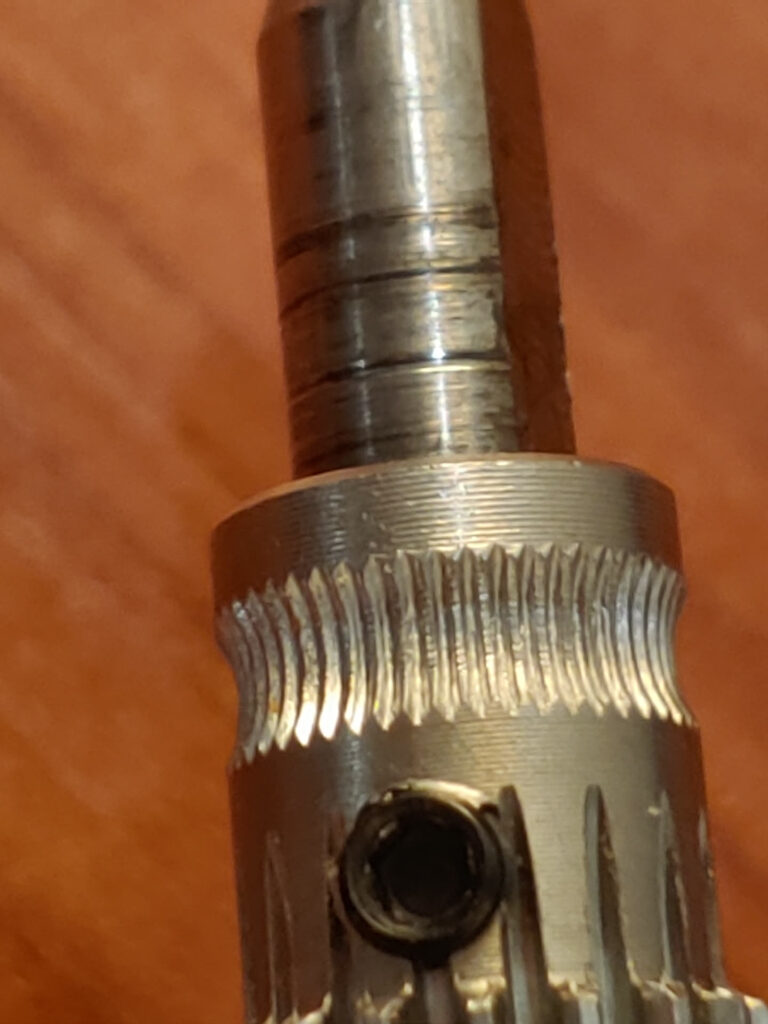
Pass or fail: fix the worn or loose part, then redo Step 2, because any mechanical fix changes the gap. If you keep ending up back at hardware every few weeks, a maintenance schedule by print hours can catch these faults before they cost you a print.
Quick Diagnostic Order: First Layer Not Sticking, Symptom by Symptom
Here’s the whole sequence sorted by symptom, so you can match what’s on your plate and start at the right step. The order still applies: if the matching step passes, carry on down the list instead of jumping around. Stop changing a setting as soon as its step passes. That habit is what keeps first layer troubleshooting short.
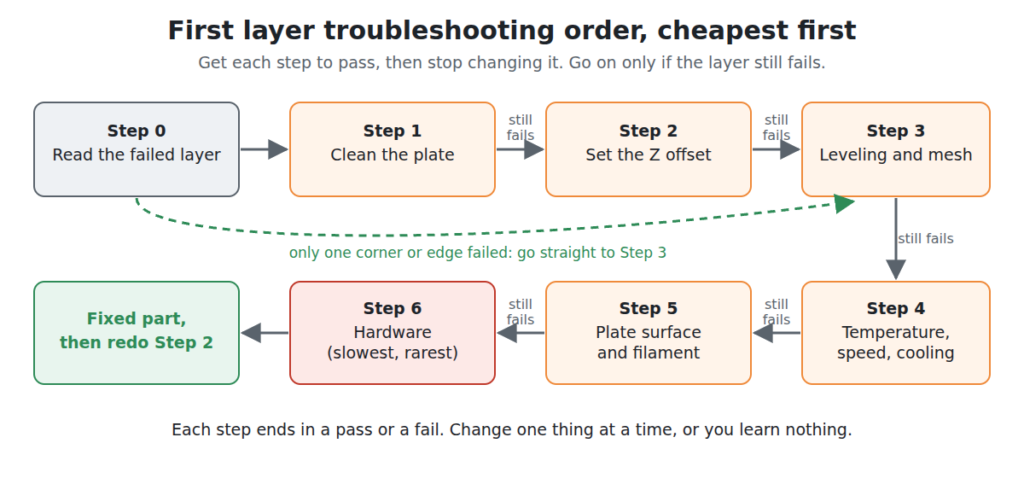
Lines round and separate, peeling off whole, everywhere: Step 1, then Step 2. Clean first, and only lower the nozzle after that.
Lines thin, see-through or ridged, nozzle scraping: Step 2. Raise the nozzle. Cleaning never fixes this one.
Lines torn or dragged by the nozzle: Step 1, then Step 2. The plastic is sticking to the nozzle better than to the plate.
Good in the middle, failing in one corner or along one edge: Step 3. The five-square test shows you which corner to adjust.
Sticks at first, corners lift partway through the layer or as it cools: Step 4. Check bed temperature, then first-layer fan and speed, then the enclosure for ABS or ASA.
A plate that used to work now fails in the same spots, or a new or old spool misbehaves: Step 5. Check the surface under a low-angle light, then swap or dry the spool.
Every step passed, and the failure is random or changes from print to print: Step 6. Check the bed, the Z axis and the extruder, in that order, then redo Step 2.
If your problems start after the first layer, my list of common failures with a test and a fix for each picks up where first layer troubleshooting stops.