 Additive Realm
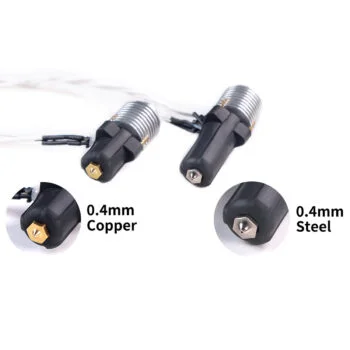
Short answer: if a spool or two of carbon-fiber filament goes through your printer each year, buy a hardened steel nozzle in the size you already use, like the Phaetus version. If you print CF most months, my pick is E3D’s Nozzle X, a coated hardened copper alloy. For heavy CF at high flow, get an Olsson Ruby. Whichever you fit, run a fresh temperature tower and a max volumetric flow test before you trust your old profile.
Why bother: 3DMag reports severe wear after roughly 250 g of CF-filled filament through a 0.40 mm brass nozzle, a figure 3DMag attributes to E3D. That’s a quarter of a 1 kg spool. Hardened steel shrugs off that wear, but it moves heat differently from brass, which is why your brass profile doesn’t carry over.
What Carbon Fiber Filament Does to a Brass Nozzle, and How Quickly
Phaetus lists carbon-fiber-filled materials as a target application for hardened steel because the reinforcement is abrasive and wears brass and softer nozzles.
How quickly depends on the exact filament. The 250 g benchmark comes from one E3D test as reported by 3DMag. Fiberon is far harsher: it says brass lasts only about 9 hours with its PA6-CF20. Both numbers belong to those specific filaments, so read them as a range of how bad it can get, not a lifespan for your spool.
How to Tell Your Nozzle Is Already Worn: Bore, Tip and Extrusion-Width Checks
Don’t judge wear from the outside of the nozzle. The bore and the tip land are what matter, and cheap tools can measure both. Keep one new nozzle of the same model in the drawer as a reference. Every check below is a comparison, and a fresh nozzle is your zero.
Bore check. Heat the nozzle and do a cold pull so no plastic is left inside. Once it’s cold, push pin gauges from a set into the orifice from the tip side and note the largest one that enters without force. On a 0.40 mm nozzle, a pin clearly larger than nominal sliding in means the bore has opened, and the reference nozzle tells you how much of that is wear and how much is manufacturing tolerance.
Tip check. Put the suspect nozzle next to your reference under a loupe or your phone’s macro mode, tip facing the lens. The flat land around the orifice should be the same width on both. A rounded or shortened land, or an orifice that has gone oval instead of round, means the fibers have been grinding the tip. A worn land also stops pressing the top of each line flat, which is where the rough top surfaces come from.
Extrusion-width check. While the nozzle is new, print a single-wall vase-mode cylinder in plain PLA. Measure the wall with calipers at several points around and up the part, and write the numbers down. When you suspect wear, reprint the same file with the same settings on the suspect nozzle and measure the same spots.
If the wall is consistently thicker, or varies more from point to point, the bore has probably widened. Get the extruder right first with extruder calibration, or you’re measuring two errors at once.
If you already see symptoms like rough top layers, fuzz, or parts that used to fit drifting out of spec, rule out the common causes of rough top layers and fuzz first. If the symptoms started after a CF spool went through brass, though, the nozzle is suspect number one.
What a Hardened Steel Nozzle Fixes and What It Costs You in Heat and Flow
A hardened steel nozzle fixes the wear problem, because it’s far harder than the fibers that grind a brass bore open. What you pay for that is heat transfer. The Techmodel V6 listing gives its hardened steel nozzle a thermal conductivity of 22 W/m·K. Steel moves heat from the heater block into the plastic more slowly than brass, so don’t guess how much flow you lose. Measure it with a flow test.
In practice that shows up in two places. First, your max volumetric flow drops. The plastic spends the same time in the nozzle but picks up less heat, so it starts to underextrude at a lower speed than it did on brass. Second, at the same print speed you need more temperature to melt it fully, so expect your temperature tower to settle higher than your old brass number. Neither is a dealbreaker. It just means your brass profile is wrong the moment the steel goes in.
Best Nozzle for Carbon Fiber by How Much You Print: Hardened Steel, Coated Hardened Copper, Tungsten Carbide or Ruby
I’d pick by how much CF you actually push through in a month, not by what sounds toughest. The harder materials cost more and bring their own trade-offs, so a nozzle that’s overkill for two spools a year is wasted money. Here’s how I’d split it.
Occasional CF (a spool or two a year): a plain hardened steel nozzle. The Phaetus version or a V6 part like the Techmodel 0.6 mm hardened steel covers it, and it’s the cheapest wear-resistant option. When CF is the exception rather than the rule, the flow hit from the section above is easy to live with.
Regular CF (most months): a coated hardened copper nozzle like E3D’s Nozzle X, or the ObXidian if you run a Revo. Both are sold as wear-resistant step-ups from plain hardened steel, made for people who print CF often. Don’t assume either one wins back the flow that steel’s 22 W/m·K costs you. Measure the gain with the max volumetric flow test.
Heavy CF plus high flow: ruby, with tungsten carbide as the fallback. A ruby nozzle such as the Olsson Ruby puts a jewel at the orifice, set into a metal body. The part that touches the fibers is extremely hard.
The jewel is the weak point against impacts, though. If your printer tends to crash into warped parts, I’d take tungsten carbide instead.
Matching the Nozzle to Your Hotend and Printer (V6, Volcano, Revo, Bambu, Prusa)
Check the hotend before you buy the nozzle. CF nylons run hot: 3DMag lists 280–300 °C for Fiberon’s PA6-CF20. A heatbreak with a PTFE liner running down toward the nozzle isn’t meant for that range.
You need an all-metal heatbreak, plus a heater and thermistor rated for those temperatures. Fitting a hardened steel nozzle to a PTFE-lined hotend doesn’t solve anything. It just means the liner fails before the nozzle does.
E3D V6 and clones: the easiest case, with the widest choice of hardened steel in every diameter. The 0.6 mm listing I cited above is exactly this kind of part. Check its overall length against your current nozzle before buying, and tighten it hot the way your hotend maker specifies.
E3D Volcano: the nozzle is longer than a V6 nozzle, so buy the Volcano-length version in hardened steel. A V6 nozzle with the same thread won’t reach the right height in the heater block.
E3D Revo: the nozzle and heatbreak are one part, so no V6 nozzle fits. Buy E3D’s wear-resistant Revo nozzle, the ObXidian version, in the diameter you need.
Bambu Lab: don’t assume from the model name whether yours ships with hardened steel or stainless. Before the CF spool arrives, check the nozzle listed on your model’s spec page or marked on the nozzle itself. If it isn’t hardened steel, buy a hardened steel nozzle made for your Bambu model in the diameter you already use.
Prusa: older machines like the MK3S+ take V6-thread nozzles, so any quality hardened steel V6 nozzle fits. Newer machines such as the MK4S use Prusa’s own nozzle system, so buy the wear-resistant version made for it instead of assuming V6.
Slicer Changes After Fitting a Hardened Steel Nozzle: Temperature, Flow, Pressure Advance and Diameter
Start at the filament maker’s temperature range and run a fresh temperature tower with the hardened steel nozzle installed. Don’t copy your brass number across, because the slower heat transfer usually pushes the sweet spot up. Use the range printed for your own spool.
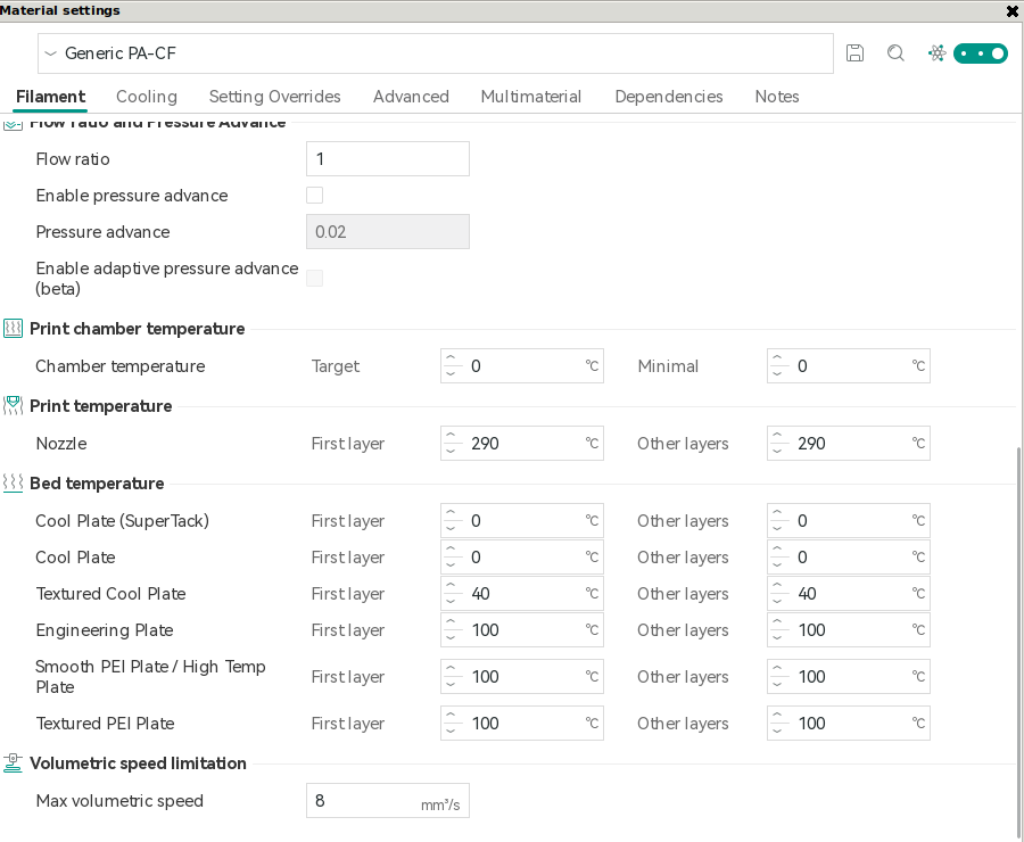
Next, re-run a max volumetric flow test and lower the limit. In OrcaSlicer and Bambu Studio that’s Max volumetric speed in the filament profile, and PrusaSlicer has the same setting under the filament’s advanced options. The screenshot shows where max volumetric speed, nozzle temperature and pressure advance sit in OrcaSlicer’s filament profile. Its Generic PA-CF values are generic starting points to overwrite with your own temperature tower, flow test and pressure advance results on the steel nozzle, not numbers to copy. Your brass number is too optimistic now. Set the limit a margin below the point where the test starts to underextrude.
Re-run pressure advance too. It’s Pressure advance in OrcaSlicer, the flow dynamics calibration in Bambu Studio, Linear Advance (the M900 K value) on Marlin and Prusa machines, and pressure_advance in Klipper. A different nozzle material changes how the melt behaves at the tip, so your old value is off. It’s the setting people forget after a nozzle swap, and it shows up as bulging corners and thin line starts.
Should you jump from 0.4 to 0.6 mm while you’re at it? My default is no. Keep the size you already use, so the swap changes one variable and your dimensions still hold. If CF keeps partially clogging your 0.4, though, 0.6 is where I’d go, because the fibers get more room at the orifice.
If you do change diameter, set it in the printer profile, then redo line width, maximum layer height, pressure advance and retraction. All four were tuned to the old orifice.
Is a Hardened Steel Nozzle Worth It? The Break-Even Math Against Replacing Brass
The break-even is simple math. Divide the hardened steel nozzle’s price by the brass nozzle’s price, then multiply by the 250 g benchmark 3DMag attributes to E3D. If your shop prices steel at four times brass, the steel nozzle has paid for itself after 4 × 250 g, which is one 1 kg spool of CF.
Plug in your own prices. With an abrasive blend like Fiberon’s PA6-CF20, where brass reportedly lasts about 9 hours, the math barely matters: one long print can outlast the brass nozzle.
The bigger cost is the one you don’t see. A worn brass nozzle doesn’t fail loudly. It keeps printing rough, out-of-spec parts, so you burn expensive CF filament and hours of print time before you notice.
My verdict, by tier: for a spool or two of CF a year, the Phaetus hardened steel nozzle in the diameter you already use. For CF most months, E3D’s Nozzle X, or the ObXidian on a Revo. For heavy CF at high flow on a printer that doesn’t crash, an Olsson Ruby, and tungsten carbide if it does crash. Whichever goes in, run the temperature tower, the flow test and pressure advance the same day.