 TreiD
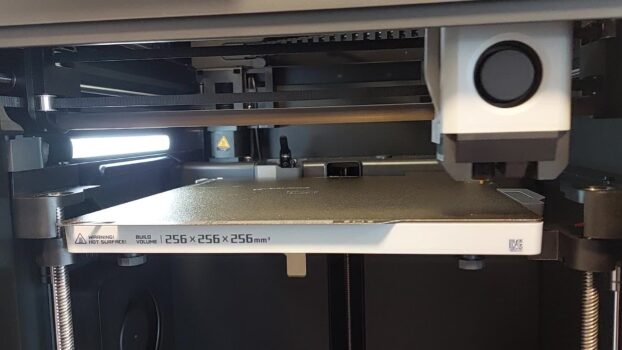
The best 3D printer build plate setup for most people is a textured PEI spring-steel sheet first and a smooth PEI sheet second. Keep a glue stick beside them: it’s the release layer whenever PETG goes on the smooth sheet, and ABS and ASA get it on both. That pair covers PLA, PETG, ABS, ASA and TPU, as long as you know where glue is non-negotiable.
AdditiveRealm hasn’t run its own lab tests on these surfaces. Everything below comes from Prusa and Bambu Lab guidance plus well-established community consensus, and I say which is which. Where my own plate comes into it, it’s the textured plate on my P1S.
The Short Answer: The Best 3D Printer Build Plate for Most People
The decision path is short: filament first, finish second, bed third. Each step narrows the shortlist, so by the end you know exactly which sheet to order.
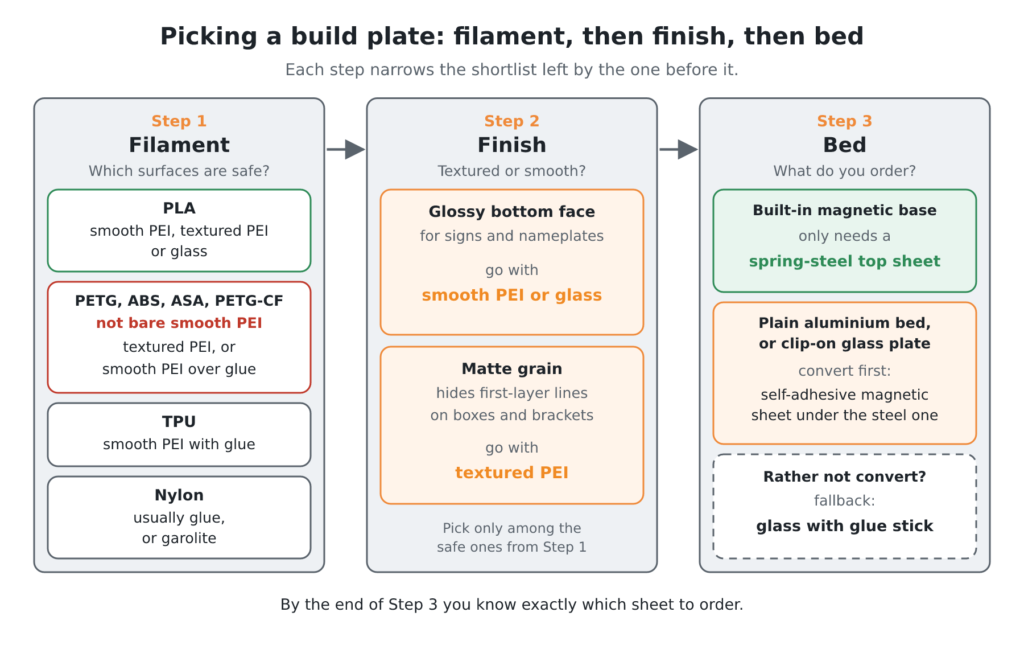
Filament decides which surfaces are safe at all. PLA is safe on smooth PEI, textured PEI and glass. PETG, ABS, ASA and PETG-CF rule out bare smooth PEI: PETG can bond hard enough to tear the coating, Prusa’s ABS guide and ASA guide pair both its smooth and textured sheets with a glue stick, and PETG-CF follows the PETG rules. TPU on smooth PEI and nylon usually get glue too, by community practice, and nylon also has garolite as its other option.
Finish picks between textured and smooth among the safe ones. If you want a glossy bottom face for signs and nameplates, go with smooth PEI or glass. If you want a matte grain that hides first-layer lines on boxes and brackets, go with textured PEI.
Bed decides what you actually buy. A bed with a built-in magnetic base only needs a spring-steel top sheet. A plain aluminium bed, or one that shipped with a clip-on glass plate, needs a magnetic conversion first: a self-adhesive magnetic sheet under the steel one. If you’d rather not convert, glass with glue stick is the fallback.
Glass, PEI, Textured and Magnetic: How Each Surface Grips and Releases
Every bed surface has to hold the first layer while printing and let go afterwards. Bambu Lab recommends waiting until the bed is at 35 °C or below before removing prints from its Textured PEI Plate, because prints come off easily once the bed is back at room temperature. Bambu lists PLA, TPU and PETG for PEI, as well as higher-temperature materials like ABS and nylon, and notes that PC, PA, ABS and ASA may need a layer of glue stick on the textured plate.
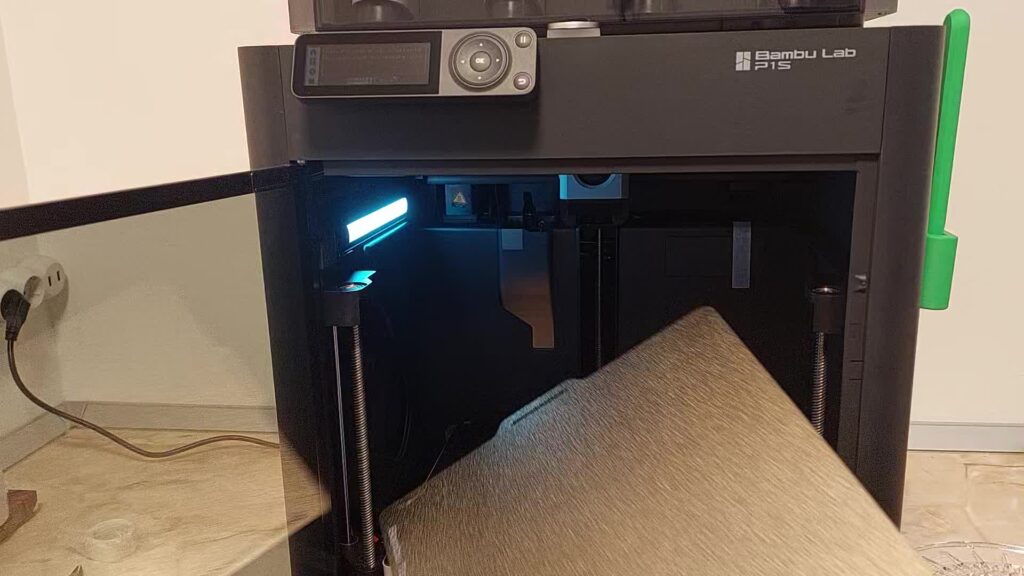
Smooth PEI grips harder than textured PEI, by community consensus. That’s ideal for PLA and a liability for some other materials, as the filament table below shows. Textured PEI is the powder-coated option Prusa’s PETG guide calls highly recommended for PETG, instead of smooth PEI, and its grain leaves the plastic less flat contact to bond to.
Glass: I’m leaning on community consensus for this one, because no manufacturer source here covers it. It grips through sheer flatness, and the part copies that surface, so the underside comes out glossy.
Most people put a glue stick on it as the usual release aid. Glue helps PETG and ABS hold, and it stops PETG bonding hard enough to chip the glass.
Magnetic isn’t a surface at all: it’s how a spring-steel sheet holds onto the bed, and the sheet on top carries the surface, such as smooth PEI, textured PEI or another coating.
PEI vs Glass Bed: Adhesion, Part Release and the First Layer You Get
Neither surface wins every case, so here’s the comparison in three points. The manufacturer guidance I draw on covers PEI only, so the glass side of each point is community consensus.
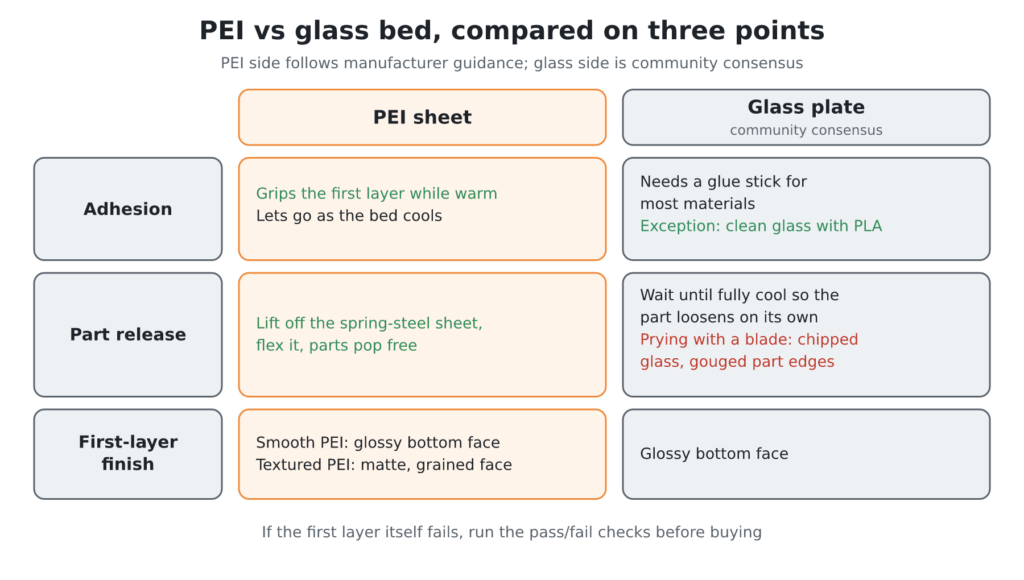
Adhesion: PEI grips the first layer while the bed is warm and lets go as it cools. Glass, by community consensus, needs a glue stick for most materials. Clean glass with PLA is the usual exception.
Part release: with a spring-steel PEI sheet, you lift the sheet off and flex it, and parts pop free. On glass, the community routine is to wait for the plate to cool fully so the part loosens on its own. Otherwise you pry it off with a thin blade, and that’s where chipped glass and gouged part edges come from.
First-layer finish: glass and smooth PEI both give a glossy bottom face, and textured PEI gives a matte, grained one. If the first layer itself is the problem rather than the surface, work through my first-layer pass/fail checks before you buy anything.
Which Build Plate for Which Filament: PLA, PETG, ABS/ASA, TPU, Nylon and CF Blends
There’s no single best 3D printer build plate for every filament, so here’s the matrix, one material at a time. For each one I list the surfaces that work, the one that can hurt you, and whether a release layer is optional or mandatory.
| Filament | Safe surfaces | Release layer or glue |
|---|---|---|
| PLA | Smooth PEI, textured PEI, glass | Not needed on PEI |
| PETG | Textured PEI; smooth PEI or glass with glue | Mandatory on smooth PEI |
| ABS/ASA | Smooth or textured PEI, with glue | Glue on both (Prusa) |
| TPU | Textured PEI; smooth PEI or glass with glue | Recommended on smooth PEI (community) |
| Nylon | PEI with glue; garolite (G10) | Usual on PEI (community) |
| PETG-CF | Textured PEI; smooth PEI with glue | Mandatory on smooth PEI |
The “mandatory on smooth PEI” cells for PETG and PETG-CF rest on Prusa’s PETG warnings, quoted below. The ABS/ASA cell follows Prusa’s ABS and ASA guides, which call for a glue stick on the smooth and powder-coated sheets alike. The TPU and nylon cells are community practice, not a manufacturer rule.
PLA: the easy one. Smooth PEI, textured PEI and glass all hold it, and it needs no release layer on PEI. None of these surfaces is at risk from PLA, so choose by the bottom finish you want, glossy or matte, which the next section covers. Just let large flat parts cool before you flex them off.
PETG: this is the filament that can actually hurt your sheet. Prusa warns that PETG can bond so strongly to smooth PEI that removing the print peels the PEI and damages the sheet beyond repair. It recommends a different sheet type or a PVA glue separation layer, and its PETG guide says plainly not to print it on the smooth PEI sheet without glue.
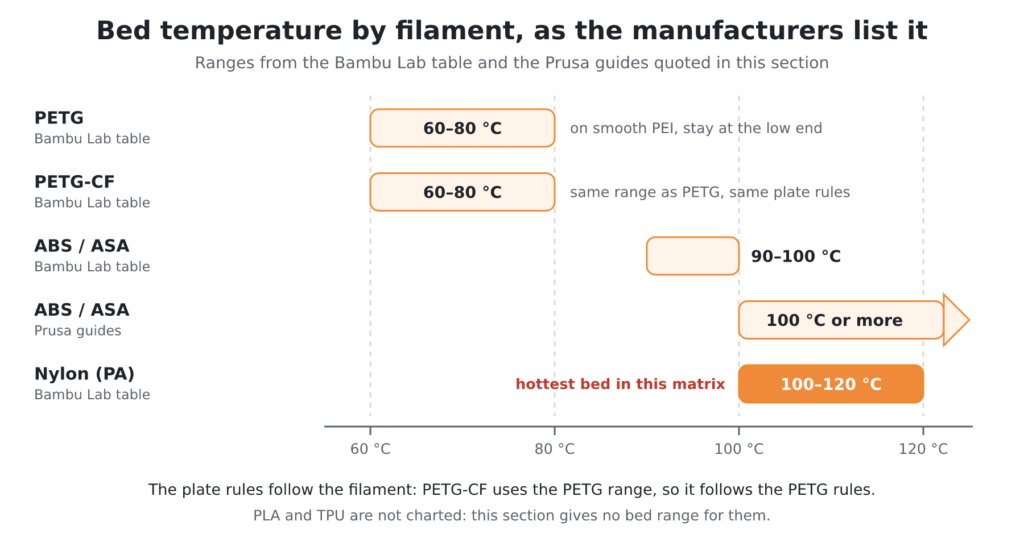
Keep the bed within the 60–80 °C range Bambu Lab lists for PETG and PETG-CF. On smooth PEI I’d stay at the low end, since grip there is already high. If you’re still deciding whether PETG is the right material at all, see PETG vs PLA for functional parts.
The manufacturers don’t fully agree, and the disagreement is useful. Bambu Lab’s table gives PETG the same 60–80 °C on its Smooth PEI plate as on textured, with no glue requirement, and its H2D guide to PLA and PETG mutual support runs PETG on a 60 °C bed with a smooth or textured PEI plate. I read that as: PETG on smooth PEI can work, but the margin is thin, and a glue stick is cheaper than a new sheet.
ABS/ASA: Prusa’s guides say to use the smooth or powder-coated PEI sheet with a glue stick, and Bambu Lab notes that ABS and ASA may need glue on its Textured PEI Plate too. Prusa wants the bed at 100 °C or more for both, and Bambu’s table gives 90–100 °C. The failure you’ll see more often is warping that peels corners off any surface. That’s an enclosure problem, covered in printing ABS without an enclosure.
TPU: textured PEI is the community favourite. Soft TPU can grip smooth PEI and glass hard enough to tear when you peel it. Flexing a spring-steel sheet also beats prying with a scraper, which cuts into a soft part.
Nylon: the hardest of the group to keep down, because it warps hard and is fussy about adhesion. Bambu’s table runs PA at 100–120 °C on its PEI plates, the hottest bed in this matrix. Garolite (G10) sheets are the long-standing community alternative to PEI plus glue. Dry the spool first, because wet nylon fails on every surface.
PETG-CF: Bambu Lab’s table gives it the same bed range as PETG and marks a hardened steel nozzle as required, so the plate follows the PETG rules and the wear lands on the nozzle. This hardened nozzle comparison covers which nozzle material to pick.
Smooth, Textured or Patterned: Choosing the Bottom Finish Your Parts Need
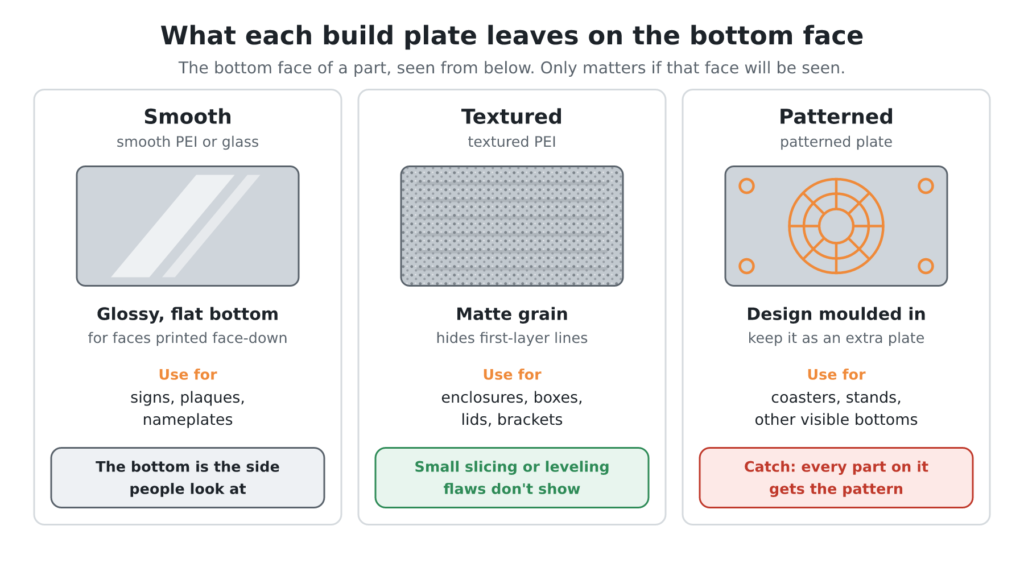
For a lot of readers, choosing a build plate is really a question about one face of the part. If that bottom face will be seen, pick the finish first and the surface second. If it’s hidden, pick purely on adhesion and release.
Smooth: smooth PEI or glass gives a glossy, flat bottom face. That suits display faces printed face-down, such as signs, plaques and nameplates, where the bottom is the side people look at.
Textured: textured PEI leaves a matte grain that hides first-layer lines, so small slicing or leveling flaws don’t show. Use it for enclosures, boxes, lids and brackets, which get handled and seen at an angle.
Patterned: patterned plates mould a design into the bottom face, so coasters, stands and other parts with a visible bottom get decoration for free. The catch is that every part printed on the plate gets the pattern, so I’d keep one as an extra plate, not the one that lives on the printer.
Buying a Magnetic Flex Plate: Size, Flatness and Heat Limits to Check
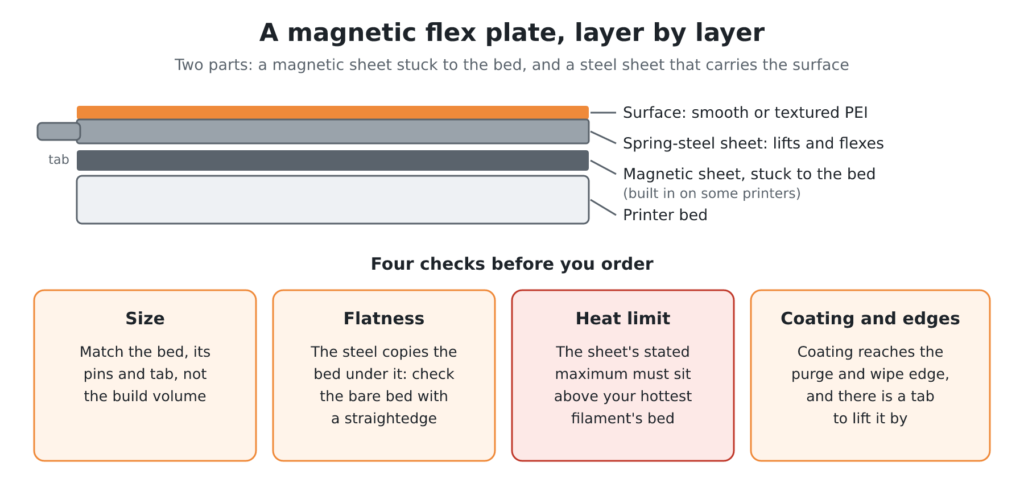
Most replacement plates sold for a given printer are magnetic flex plates, and they come in two parts. One is a magnetic sheet stuck to the bed, the other is a spring-steel sheet with the surface on top. Some printers ship with the magnetic base built in, so you only buy the top sheet. Check which one you have before ordering, because a top sheet alone won’t stick to a plain aluminium bed.
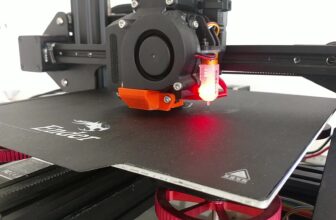
Teaching Tech’s Ender 3 build surface comparison sets the stock surface against two aftermarket upgrades for a plain-bed printer: tempered glass and the Easy Peelzy removable magnetic surface.
Size: match the plate to your bed, not to the build volume. The build volume shown for a printer on our Comparison chart is the printable area. The plate is usually bigger, and plates of the same nominal size can put their alignment pins or tab in different places. Buy a plate sold for your exact printer model, or measure the bed and pin positions yourself.
Flatness: a spring-steel sheet copies whatever is under it, so it can’t fix a warped bed. Lay a straightedge across the bare bed before you buy. If you see light under it, a magnetic sheet won’t help, but a probe with mesh leveling or a glass plate will. Also check that the steel sheet arrives flat, since thin sheets can bend in shipping and never quite settle.
Heat limits: your hottest filament sets the bar. In Bambu Lab’s material table, the PETG bed tops out at 80 °C and the ABS and ASA bed at 100 °C, while nylon (PA) runs at 100–120 °C on its PEI plates. If a listing states a maximum temperature for the magnetic sheet, check it sits above the number for your hottest filament; if it states none, treat the limit as unknown.
Coating and edges: check that the coating reaches the edges your printer uses for its purge line or nozzle wipe, and that the sheet has a tab to lift it by. Double-sided sheets, smooth on one side and textured on the other, are a cheap way to get two surfaces. The trade-off is that whichever face is down always rests on the magnet or your bench.
Making a Plate Last: Cleaning, Release Agents and When to Replace It
Prusa’s surface-preparation article gives a wipe with 90% isopropyl alcohol before almost every print, and Prusa’s first-layer guide adds an occasional wash with dish soap and warm water when adhesion drops even after IPA. That wash is the fix on my P1S. In about 1,617 hours it has failed roughly 5% of prints, mostly on adhesion: grease from my hands gets on the bed, and prints letting go of a dirty plate is the fault that kept coming back. Bambu’s plate guide makes the same point about fingers, since skin oils reduce the plate’s adhesion.
Bambu Lab’s material guide also recommends dish soap and hot water, and warns against acetone on its plates. Prusa allows acetone only on its smooth PEI sheet, about once a month, because overuse makes PEI brittle. And a freshly cleaned smooth PEI sheet is exactly where PETG over-grips, so that’s when the glue goes on.
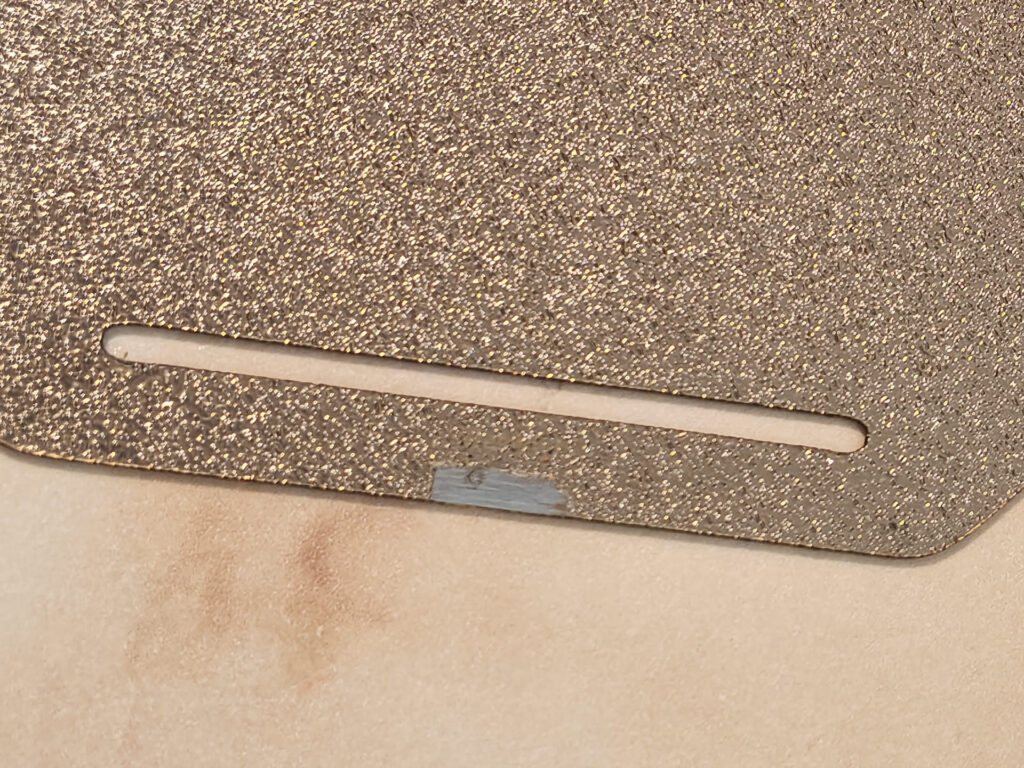
Before you decide to replace a plate, check two spots: the purge or nozzle-wipe zone at the plate edge, and the centre of the bed, where most parts get placed. On my P1S’s textured plate, the nozzle-cleaning routine it runs at the start of every print has worn a grey patch at the edge, beside the slot, and Bambu says this wipe-zone wear doesn’t affect the nozzle or the plate. I’d replace a plate once worn or shiny spots reach the area your first layers use, or when parts keep lifting in the same spot after a proper wash.
Prusa’s first-layer guide notes that PEI can lose its adhesive powers after a couple of hundred hours, so a hard-worked sheet gets there eventually.
Deep gouges from a nozzle crash or a scraper are the other end-of-life sign. Prusa says small marks from the nozzle or tools don’t affect adhesion, and can be smoothed with the hard side of a dry kitchen sponge or 400–600 grit sandpaper. A deep gouge is different: your next first layer fills it, and the part either locks into it or prints with a ridge. Release parts by flexing the sheet, keep metal scrapers off PEI, and flip a double-sided sheet before you bin it.
The Two-Plate Setup That Covers Almost Every Filament
Plate one is textured PEI, and it lives on the printer. It’s the sheet type Prusa recommends over smooth PEI for PETG, and it takes PLA, PETG and TPU without a release layer. ABS and ASA may still want glue on it, and nylon usually does, or goes on a garolite sheet instead. On a Bambu Lab printer that’s the Textured PEI Plate, the one on my P1S, and on a Prusa it’s the textured powder-coated sheet.
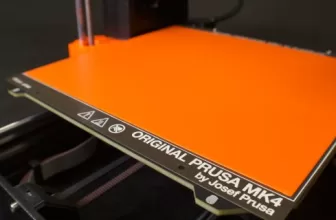
Plate two is smooth PEI, for glossy PLA and small parts that need maximum grip: Bambu Lab’s Smooth PEI Plate or Prusa’s smooth PEI sheet. Anything the table marks for glue on smooth PEI goes on this plate only over a glue-stick layer, with the bed at the low end of the material’s range. On a plain-bed printer like the Ender 3 class, the setup starts with a magnetic base plus textured PEI spring-steel kit sold for your exact model, and the smooth sheet joins it later.
If you’d rather not add a magnetic base, a glass plate with glue stick can be your single plate for PLA and PETG, at the cost of flex release.
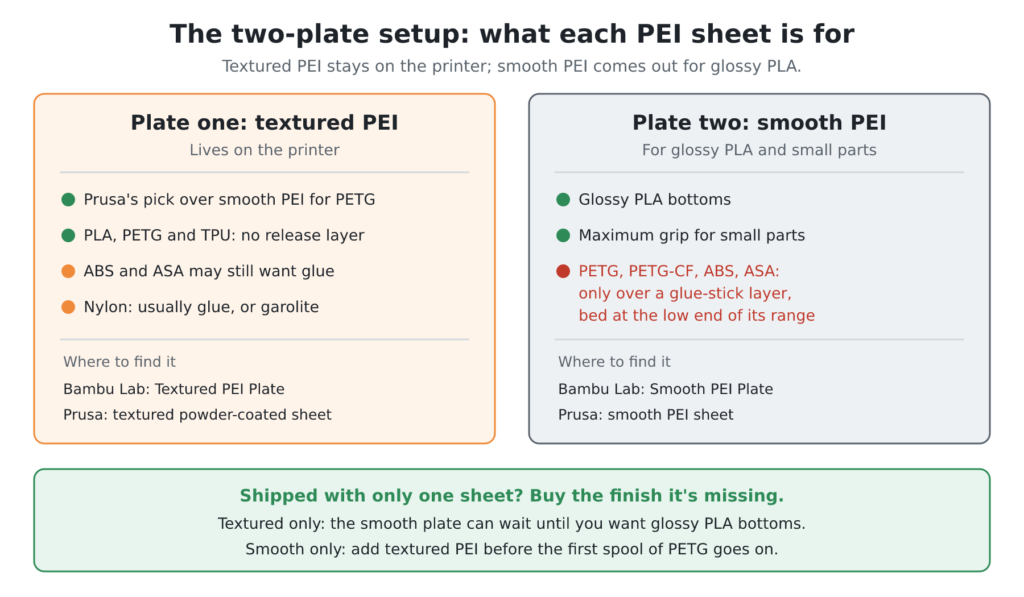
If your printer shipped with only one sheet, buy the finish it’s missing. A textured stock plate can wait for a smooth partner until you actually want glossy PLA bottoms. A smooth-only printer should get textured PEI before the first spool of PETG goes on, because a torn coating costs more than the sheet that prevents it. The best 3D printer build plate to add is the one that covers the filament you print next.
Sources
- Prusa Research Knowledge Base: Print surface preparation
- Prusa Research Knowledge Base: ABS
- Prusa Research Knowledge Base: ASA
- Bambu Lab Wiki: Introduction to Bambu Lab Build Plates
- Prusa Research Knowledge Base: PETG
- Bambu Lab Wiki: Filament guide (printer, nozzle, build plate and glue compatibility)
- Bambu Lab Wiki: Printing guide for using PLA Basic and PETG as mutual supports (H2D)
- Teaching Tech (YouTube): Ender 3 build surface comparison: Stock vs glass vs Easy Peelzy magnetic sheet
- Prusa Research Knowledge Base: First layer issues