Estimated reading time: 14 minutes
Key Takeaways
- Use a systematic framework (symptom, cause, test, adjust, prevent) to diagnose and fix 3D printing issues.
- A quick triage checklist covering filament, hardware, bed, temperatures, slicer, environment, and calibration catches about 80% of common failures.
- Adjusting key parameters like speed, temperature, retraction, and flow resolves issues such as first-layer problems, warping, stringing, and extrusion errors.
- Preventive maintenance, calibrated profiles, and properly dried filament keep printers running reliably and consistently.
- Different materials require unique baseline settings for optimal adhesion, strength, and surface finish.
If you’re searching for 3D printing problems solutions, this field-tested guide is exactly what I wish I had when I started. I’ll show you how I diagnose, fix, and prevent the most common failures using a simple framework: symptom, cause, test, adjust, prevent. We’ll cover first layer issues, bed adhesion problems, layer adhesion issues, warping 3D prints, stringing 3D printing, under extrusion fixes, over extrusion solutions, dimensional accuracy problems, and overall print quality improvement.
I built this 3D printing problems solutions framework after too many late-night reprints and one dramatic ABS “curl of shame” that popped off mid-print. My approach is practical. I change one variable at a time. I log what worked. And I save winning profiles.
3D printing problems solutions: Quick Triage Checklist

Before deep-dive troubleshooting, I always run this quick triage. It catches 80% of dumb mistakes. It also saves time, filament, and sanity. This is the backbone of my 3D printing problems solutions ritual.
- Filament
- Confirm the material type and target temps.
- Check it’s dry and stored in a sealed bin with desiccant.
- Measure filament diameter in three spots with calipers.
- Make sure the spool spins freely and the path is clear.
- Hardware
- Clean the nozzle. A brass brush and a cold pull work wonders (source).
- Verify nozzle size in your slicer.
- Check Bowden couplers or direct-drive tension. No slipping.
- Tension belts and make sure the frame is square and tight.
- Bed
- Level or enable mesh leveling. Don’t assume it’s fine.
- Validate Z-offset with a paper test or a first-layer test print.
- Clean the surface with 90%+ IPA.
- Use the right plate: smooth PEI, textured PEI, glass, or adhesive as needed.
- Temperatures
- Verify hotend and bed temps match the material.
- If unsure, print a temperature tower to find the sweet spot (source).
- Slicer sanity check
- Filament diameter set correctly (often 1.75 mm).
- Line width about 100–120% of nozzle size.
- Layer height at or below 80% of nozzle diameter.
- Baseline flow at 100% until you calibrate.
- Environment
- Eliminate drafts. Close doors, block vents.
- Use an enclosure for ABS/nylon to stabilize heat.
- Ensure plenty of part cooling for PLA, but not on the first layer.
- Calibration basics
- Calibrate E-steps and flow (extrusion multiplier) using our step-by-step extruder calibration guide.
- Enable input shaping or linear advance if your firmware supports them.
Navigation Aid
Use these 3D printing problems solutions jump links to hop to your symptoms:
- First layer issues
- Bed adhesion problems
- Layer adhesion issues
- Warping 3D prints
- Stringing 3D printing
- Under extrusion fixes
- Over extrusion solutions
- Dimensional accuracy problems
- Print quality improvement
Diagnostic Framework I Use
I apply the same 3D printing problems solutions pattern in every section.
- Identify the symptom
- Rank likely root causes
- Test one variable at a time
- Adjust settings using proven starting values
- Add prevention steps to lock in the fix
I used to tweak five things at once. I learned the hard way. Change one thing, re-test, then commit when you see repeatable improvement.

First layer issues
The first layer is your contract with the print. If it fails, the rest is noise. Typical symptoms include uneven squish, gaps, elephant’s foot, or lines that don’t touch (source). This is where most 3D printing problems solutions begin for me.
Likely causes are a wrong Z-offset, poor bed leveling, a dirty surface, too-fast first layer, or temps set too low. I start with Z-offset. I want a light, even squish that looks like smooth tape. If mesh leveling is on, I’ll toggle it off and manually level to isolate a bad mesh.
Quick fixes that work:
- First-layer speed: 15–25 mm/s
- First-layer line width: 120–140% of nozzle
- First-layer flow: 105–110%
- First-layer height: 0.2–0.28 mm on a 0.4 mm nozzle
- Raise bed and nozzle temps by +5 °C if adhesion is poor
- Add a brim or even a raft for tricky parts
Prevention is routine. I save per-material first-layer profiles. I clean the bed before every print. And I revalidate mesh monthly.
Bed adhesion problems

Corners lifting, patchy stick, or a model that detaches mid-print? That’s classic bed adhesion problems. I once chased this for a week with PETG, only to find my bed temp was 10 °C too low for that brand.
Most often, the surface and temps don’t match the material. Here’s what I dial in fast:
- Choose the right surface: smooth PEI, textured PEI, glass with glue stick, or adhesives like Magigoo.
- Bed temps I use: PLA 55–65 °C, PETG 70–85 °C, ABS 90–110 °C (source).
- Preheat the bed for 10 minutes to stabilize.
- For ABS/ASA, disable the part cooling fan for the first 2–3 layers.
- Add a brim, mouse ears, or chamfers to boost contact area.
Environment matters. Use an enclosure for ABS/nylon and kill drafts. To lock in the fix, I keep the bed clean, reapply adhesives every 10 prints, and store build plates flat. This simple checklist is one of my favorite 3D printing problems solutions because it pays off immediately.
Layer adhesion issues

Layers splitting or delaminating on a bend? That’s layer adhesion issues. I do a quick test print: a 20 mm tall, 10 mm cube. Then I flex it. If it cracks between layers, I know I’m running too cold, cooling too hard, or going too fast (source).
My rapid-fire adjustments:
- Increase nozzle temperature by 5–15 °C. Tough materials need heat (source).
- Reduce or disable the fan for ABS/nylon. For PETG, keep fan around 20–30% after layer 3.
- Slow main printing speed to 30–45 mm/s.
- Dry filament at 40–50 °C for at least 4 hours if it’s hygroscopic.
- Increase wall count to three or more and bump line width to 110%.
- Raise flow by 2–5%.
- Enable a minimum layer time of 15 seconds.
Preventive tips: print high-temp materials in an enclosure, keep room temperature above 20 °C, and store filament dry. This is a core win in my 3D printing problems solutions playbook.
Warping 3D prints
Warping is my least favorite gremlin. Corners lift, then a beautiful print becomes abstract art. The causes are thermal gradients, low bed temp, drafts, and sharp geometry. ABS is notorious here.
What works consistently:
- Raise bed temperature by 5–10 °C above baseline; think PLA 60 °C, ABS 100 °C.
- Use an enclosure or a slicer draft shield to stabilize air around the part (source).
- Add a brim or raft, and place “mouse ears” at sharp corners.
- Reduce part cooling for the first 5–10 layers.
- Add fillets to sharp corners in CAD.
- Slow the first five layers to 20 mm/s.
Material strategy helps too. PETG and ASA warp less than ABS for many shapes. You can also anneal ABS after printing to relieve stress. These tactics form a reliable branch of my 3D printing problems solutions for big parts and long jobs.
Stringing 3D printing
Hairlike strands between features are a sign of stringing 3D printing. I’ve had TPU prints that looked like a spaghetti monster. The big levers are retraction, temperature, and travel.
I run a retraction tower, reference our Retraction 101 setup, and inspect the strings. Then I adjust:
- Retraction distance and speed: direct drive 0.8–1.2 mm at 25–45 mm/s; Bowden 3–6 mm at 25–45 mm/s (source).
- Lower nozzle temp by 5–15 °C in 5 °C steps.
- Enable combing or avoid crossing perimeters. Add wipe and coast.
- Push travel speed to 180–220 mm/s.
- Dry the filament. Moisture can cause hiss and strings.
- Clean or replace a worn nozzle if it’s oozing or has buildup.
For prevention, I keep per-filament retraction profiles and dry TPU/PETG regularly. When stringing vanishes, prints clean up dramatically, and it feels like magic—another quick win in the 3D printing problems solutions toolkit.
Under extrusion fixes

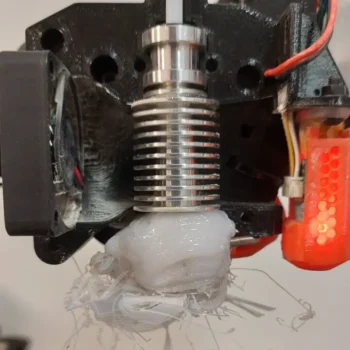
Gaps, thin walls, brittle parts, or missing layers all point to a starvation problem. These under extrusion fixes have saved so many prints for me. Typical causes include partial clogs, wrong E-steps, low temps, or a tight filament path (source).
My diagnostic flow:
- Do a 100 mm extrusion test and measure the actual extruded length.
- Print a flow calibration cube to tune the extrusion multiplier.
Then I adjust:
- Perform a cold pull or swap the nozzle to clear clogs.
- Calibrate E-steps to match reality.
- Set flow to a clean 100%, then fine-tune ±5%.
- Raise nozzle temp by 5–10 °C to improve melt.
- Reduce speed and acceleration by 20%.
- Tighten the feeder idler and ensure PTFE couplers fit smoothly.
Preventive steps include cleaning the nozzle every 50 hours, storing filament dry, and replacing PTFE liners as recommended. These under extrusion fixes are cornerstone 3D printing problems solutions in my shop.
Over extrusion solutions
If you see blobs, zits, elephant’s foot, or walls too thick, you’re over-extruding. I’ve chased this when a slicer profile accidentally had flow at 110%. Whoops. The causes: flow too high, wrong filament diameter, incorrect E-steps, or even low speeds building pressure (source).
Here’s what I change:
- Verify filament diameter in the slicer matches your measured value.
- Calibrate E-steps, then set the extrusion multiplier around 0.95–1.00.
- Reduce line width to 100–120% of nozzle size (0.4–0.48 mm on a 0.4 mm nozzle).
- Lower nozzle temperature slightly or raise print speed 10–20%.
- Enable linear advance or pressure advance if supported.
- Use elephant’s foot compensation in the slicer.
To prevent this creeping back, I calibrate flow per spool and save profiles. As far as 3D printing problems solutions go, a single calibration cube can save hours here.
Dimensional accuracy problems
If parts don’t fit, holes are undersized, or features are off scale, you’re facing dimensional accuracy problems. I design functional parts, so fit is everything. My go-to method is simple.
Diagnostics:
- Print an XYZ calibration cube (see our 3D printer resolution guide for why this matters).
- Measure it with calipers and note X/Y/Z errors (source).
Adjustments I make:
- Tension belts and verify X/Y steps per mm.
- Tune flow with a calibration cube to remove elephant’s foot and over-thick walls.
- Use horizontal expansion and hole compensation in the slicer.
- Add elephant’s foot compensation or design a small negative chamfer on the base.
- Account for shrinkage: ABS ~0.5–1%, nylon ~1–2%.
Prevention comes from using test coupons for known fits and documenting calibration values per printer. This is a high-value chapter of my 3D printing problems solutions for anyone doing functional assemblies.
Print quality improvement
Once your printer is reliable, chase polish. I like to reduce ringing, hide Z-seams, and dial resolution for a pro finish. This is where 3D printing problems solutions evolve into performance tuning.
For surface and detail:
- Reduce ringing by lowering acceleration/jerk or enabling input shaping.
- Minimize Z-seam by aligning it to a corner or randomizing start points.
- Optimize layer height to 25–75% of nozzle diameter for crisp details.
- Pick the right nozzle size for your goal: 0.6 mm for speed, 0.25–0.3 mm for fine detail.
- Keep filament dry for consistent sheen and bonding.
For strength vs. speed:
- Increase wall count and infill density for stronger parts.
- Choose infill wisely. Gyroid balances strength and speed.
- Consider annealing ABS or PETG to boost strength and heat resistance.
For repeatability:
- Save proven slicer profiles per material and per printer.
- Log environment, calibration, and maintenance. Future you will say thanks.
If you want a deeper library to explore, the MatterHackers 3D Printer Troubleshooting Guide is an excellent companion reference with photos and fixes that complement this post (helpful anchor text: MatterHackers 3D Printer Troubleshooting Guide).
Material-specific notes
I treat each material as its own personality. A few baselines I keep:
- PLA: 190–220 °C nozzle, 55–65 °C bed, fan 100% after layer 2. Watch for stringing above 210 °C.
- PETG: 230–250 °C nozzle, 70–85 °C bed, fan 20–40% after layer 3. Monitor elephant’s foot.
- ABS/ASA: 240–260 °C nozzle, 90–110 °C bed, minimal fan, use an enclosure to prevent warping (source).
- TPU/flex: 210–230 °C nozzle, 40–60 °C bed, slow speeds 20–30 mm/s, short retraction 1–2 mm direct, smooth filament path essential (source).
These starting points save me time and keep me focused on testing one variable at a time.
Tools, tests, and models I rely on
My bench always has:
- Digital calipers, feeler gauges, IPA, brass brush, nozzle cleaning needles.
- Test prints: temperature tower, retraction test, flow cube, XYZ calibration cube, overhang/bridge tests (source).
- Download test files from trusted repositories like Printables or Thingiverse to standardize comparisons.
For manufacturer-backed guidance, I also check the Bambu Lab official troubleshooting wiki for temperature ranges and material notes, especially for bed adhesion and warping details (source). And I always revisit NinjaTek’s flexible filament troubleshooting when printing TPU (source).
Preventive maintenance
Reliability isn’t luck. It’s a routine. This set of 3D printing problems solutions keeps my printers humming:
- Clean nozzle and heat break every 50 hours. Do a cold pull monthly.
- Replace PTFE liners per manufacturer schedules.
- Lubricate linear rails and lead screws quarterly.
- Check and tension belts every two months.
- Update firmware and verify thermistor accuracy with an IR thermometer.
I also keep a maintenance log. If a print goes sideways, I can trace it back to a change.
Final note
When a print fails, don’t panic. Breathe. Run the triage. Apply the framework. Most issues fold fast once you isolate the cause. My goal is to turn this post into your go-to library of 3D printing problems solutions that you can apply today and trust tomorrow. And if you want to compare settings or double-check a diagnosis, manufacturer guides are gold—like the Bambu Lab official troubleshooting wiki for temperatures and materials (source) and NinjaTek’s advice for stringing and flexible filaments (source).
Frequently Asked Questions
Q: What’s the first thing I should check when a print fails?
A: Run the quick triage checklist covering filament, hardware, bed, temperatures, slicer settings, environment, and calibration—it solves about 80% of issues in minutes.
Q: How can I tell if I’m experiencing under extrusion or over extrusion?
A: Under extrusion shows gaps, thin walls, or missing layers, while over extrusion creates blobs, zits, and too-thick walls; use flow calibration cubes and inspect walls to confirm.
Q: Why does ABS warp more than PLA, and how do I stop it?
A: ABS shrinks more as it cools, causing corner lift; keep the bed around 100 °C, print inside an enclosure, reduce cooling for early layers, and add brims or draft shields to control warping.
Q: How often should I clean or replace my nozzle?
A: Clean the nozzle (or perform a cold pull) roughly every 50 printing hours and replace it when clogs persist, the orifice is worn, or print quality suddenly declines.
Q: Do I need different settings for each brand of filament?
A: Yes—each spool can vary; start with the material baselines in this guide, print temperature and retraction towers, and save a calibrated profile for every filament you use.