Introduction

Have you ever looked at a blank wall and thought, “Man, this needs something special!”? I know I have! Well, what if I told you that you could create your own custom wall art, tailored perfectly to your style, using a 3D printer? It’s true! 3D printed wall art is a total game-changer for home decor, and it’s way more accessible than you might think.
I remember when I first started experimenting with 3D printed art, I was blown away by the possibilities. Suddenly, I wasn’t limited to what I could find in stores. I could create anything I could imagine! This guide is going to walk you through the entire process, from designing your art to printing it and hanging it on your wall. So, get ready to unleash your inner artist and create some truly unique 3D printed art!
Table of Contents
Why 3D Printing is Perfect for Wall Art
So, why is 3D printing such a great option for wall art? Well, for starters, it’s all about customization. You know how frustrating it is when you can’t find exactly what you’re looking for in stores? Yeah, I’ve been there. With 3D printing, you can create pieces that are totally unique to your space. Want a piece of art that matches your favorite color scheme? You got it. Need a specific size or shape to fit a particular spot on your wall? No problem. It’s like having a superpower for decorating.
And let’s talk about cost. Have you seen how much some of those trendy art pieces cost? It’s insane! With a 3D printer, you can make similar items for a fraction of the price. Sure, there’s an initial investment in the printer itself, but trust me, it pays off in the long run. Plus, you get the satisfaction of making something yourself. I remember I was looking for a specific kind of geometric art, and they were all like 50−100 a piece. I was like, “Nah, I can print that!” And I did. Saved a ton of money and got exactly what I wanted. It was a total win. The other thing is that you can make things to fit your space. If you need a specific size of a piece, you can design it and print it. It’s a game changer.

Getting Started with 3D Printing Wall Art
Okay, so you’re sold on the idea of 3D printing your own wall art. Awesome! Now, let’s talk about getting started. First things first, you’ll need a 3D printer. There are tons of options out there, but for wall art, you don’t need anything super fancy. A good entry-level printer will do the trick. I started with a pretty basic one, and it’s been great. When you’re picking out a printer, look at the build volume. This is the size of the objects you can print. If you want to print big art pieces, you will need a bigger build volume.
You’ll also need to get familiar with different 3D printing materials. PLA is the most common and easiest to work with, and it’s great for most projects. ABS is another option, but it’s a bit trickier to print with. PETG is also a good option. It’s stronger than PLA and can handle higher temperatures. You can check out my top 5 3D printers picks for home decor.

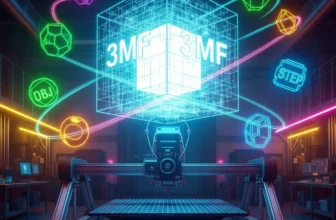
Enclosed design
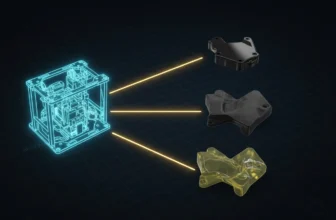
Multi-color printing
Proprietary parts

Easy assembly
Direct drive extruder
Lacks filament run-out sensor

Reliable

Multi-color capability

Handles various materials
And don’t forget about tools! You’ll need things like a scraper for removing prints from the bed, some pliers for removing supports, and maybe some sandpaper for smoothing things out. Setting up your 3D printer can be a bit intimidating at first, but there are tons of tutorials online that can walk you through it. And most importantly, be sure to follow basic safety precautions. 3D printers can get hot, so be careful.
Designing Your 3D Printed Wall Art
Alright, now for the fun part: designing your 3D printed art! You’ve got a couple of options here. You can either design your own models from scratch or download pre-made models from sites like Thingiverse or Maker World or Printables. If you’re feeling creative, I highly recommend trying out some 3D modeling software. Tinkercad is a great option for beginners, it’s free and easy to use. Fusion 360 is another popular choice, but it’s a bit more advanced. I started with Tinkercad, and it was surprisingly easy to pick up. I made some pretty wonky designs at first, but hey, that’s part of the learning process.
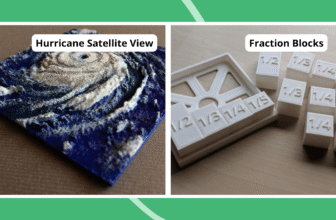
If you are downloading designs, be sure to check the print settings before you print. Some designs need support structures, and you will need to adjust your printer settings. When you’re designing or choosing a model, think about how it will look in your space. Consider the size, shape, and color. And don’t be afraid to experiment! That’s the beauty of 3D printing. You can try out different ideas without breaking the bank. Here is a great example of a 3d printed Geometric Wall Art and another Abstract.


3D Printing Techniques for Wall Art
Okay, let’s talk about some specific 3D printing techniques that are useful for this type of art. First, you’ll need to choose the right print settings. For your project, you’ll want to use a relatively small layer height to get a smooth finish. You’ll also want to use a good infill percentage to make sure your print is strong enough to hang on the wall. Support structures are also important, especially if you’re printing complex designs. You’ll need to use supports to prevent your print from collapsing during printing. I’ve had a few prints fail because I didn’t use enough supports. It’s a frustrating experience, but you learn from your mistakes.
If you’re printing large pieces, you might need to print them in multiple parts and then assemble them later. This can be a bit tricky, but it’s definitely doable. I’ve printed some really large pieces that were made up of multiple smaller parts. It’s like putting together a puzzle. And don’t forget about troubleshooting. 3D printing can be a bit finicky, so you’ll need to be prepared to troubleshoot common issues like warping, stringing, and layer adhesion. Here is a great example of a multi-part art.

Post-Processing and Finishing Your 3D Printed Wall Art
So you’ve printed your masterpiece, and now it’s time to make it look its best. This is where post-processing comes in. First, you’ll need to remove any support structures that were used during printing. This can be a bit tricky, but with a little patience, you’ll get the hang of it. Then, you’ll want to sand down any rough edges or imperfections. I like to start with a coarse grit sandpaper and then move to a finer grit for a smooth finish.
Painting is another great way to customize your 3D prints. You can use spray paint, acrylic paint, or even markers. I’ve had a lot of fun experimenting with different painting techniques. You can add details like stencils, decals, or even glitter. And finally, you can seal your prints to protect them from moisture and wear. There are tons of sealants available at your local hardware store. Post-processing can be a bit time-consuming, but it’s totally worth it. It’s what takes your 3D print from looking like a plastic toy to looking like a professional piece of art.
Mounting and Displaying Your 3D Printed Wall Art
So you’ve created your masterpiece, and now it’s time to hang it on the wall. Mounting and displaying your 3D printed wall art is just as important as the design itself. You’ll need to choose the right mounting hardware for your art. For lightweight prints, you can use command strips or double-sided tape. For heavier prints, you’ll need to use screws or nails. I’ve had a few prints fall off the wall because I didn’t use the right mounting hardware. It’s a frustrating experience, but you learn from your mistakes.
If you’re creating a gallery wall, you’ll need to plan out the layout carefully. You can use a template to help you arrange your art pieces. Lighting is also important. You’ll want to make sure your art is well-lit so that it can be seen properly. I’ve seen some really cool gallery walls that are lit with spotlights or LED strips.
Ideas and Inspiration for 3D Printed Wall Art
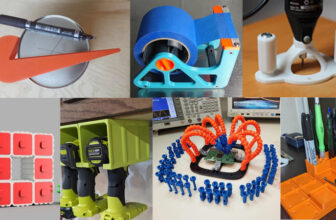
Okay, let’s talk about some specific ideas for 3D printing. The possibilities are endless, but here are a few of my favorites. Abstract designs and geometric patterns are super popular. You can find tons of cool designs online, or you can design your own. I’ve printed everything from simple geometric shapes to elaborate, abstract patterns.
Text-based art and quotes are another great option. You can print your favorite quotes, song lyrics, or even your own name. I made a really cool piece with a quote that I love. It’s a great conversation starter. Nature-inspired designs and landscapes are another area where 3D printing can really shine. You can print flowers, trees, mountains, or even entire landscapes.
Pop culture and fan art are also great options. You can print your favorite characters, logos, or scenes from movies or TV shows. And don’t forget about personalized and custom designs. You can create pieces that are totally unique to you. I’ve made some really cool pieces that were inspired by my own photos or drawings.


Conclusion
So, there you have it! My guide to designing and 3D printing your own unique wall art. It’s been a journey, and I’m so excited for you to start your own 3D printing adventure. Remember, the key is to experiment, have fun, and don’t be afraid to make mistakes. That’s how you learn and grow. And most importantly, don’t be afraid to make your own designs. You can create anything you want. So go ahead, unleash your creativity, and start making some awesome 3D printed wall art. And when you do, be sure to share your projects in the comments below. I can’t wait to see what you create!
Home Decor: Essential 3D Printer Guide – Top 5 Picks for 2025![Wall Art: Essential Guide to 3D Printing Masterpieces [2025]](https://additiverealm.com/wp-content/uploads/thumbs_dir/home-decor-vase-scaled-qz4x9a2yunhwcmsdd9wymo8vavvl029nl3m3ghn67w.jpg)
![Wall Art: Essential Guide to 3D Printing Masterpieces [2025]](https://additiverealm.com/wp-content/uploads/thumbs_dir/Anycubic-Kobra-S1-News-qzh67kxkns7vwmh9lj2ahck3tzgsbv573li5q6nprw.png)