Estimated reading time: 15 minutes
Key Takeaways
- Online 3D printing services give beginners instant access to industrial-grade machines, materials and global shipping without buying a printer.
- Success starts with clean, correctly-scaled STL/OBJ/3MF files and a basic grasp of wall-thickness, tolerances and process limits.
- Select the right process–material combo (FDM-PLA, SLA-resin, SLS-nylon, etc.) based on strength, detail, heat resistance and budget needs.
- Instant-quote platforms let you tweak material, finish and quantity in real time—use this to optimize cost, lead time and part performance.
- Document critical dimensions, surfaces and units in your order notes to avoid scaling errors, tolerance surprises and reprints.
Introduction
If you’re wondering how to use online 3d printing service platforms to bring your designs to life, this guide has you covered. I wrote it with 3d printing for beginners in mind, and I’ll demystify every step of working with an online 3d printing service from upload to unboxing.
The first time I ordered parts online, I was nervous. Would my STL even be printable? Would the parts fit? After a few missteps (and one comically tiny bracket because I uploaded in inches), I built a reliable workflow. I’ll share it here so you can skip the mistakes and get great results the first time.
Table of Contents
How to Use Online 3D Printing Service 101: What Is an Online 3D Printing Service (aka an Online 3D Bureau)?

An online 3d printing service is a web-based shop that gives you access to professional 3D printers, industrial materials, skilled technicians, quality assurance, and global shipping—all through a browser. You upload a file, pick a material and finish, get an instant quote, and place your order. The bureau prints your part, performs QA, and ships it to your door (source). Many beginners prefer this path because it unlocks technologies and finishes that home printers can’t match (source).
Behind the scenes:
- You upload your 3D model (STL/OBJ/3MF).
- The service checks it for errors and shows a preview.
- You select process, material, color, and finish.
- The platform calculates price and lead time instantly.
- The bureau prints, inspects, post-processes, and ships your parts (source).
For file prep help, I recommend this detailed guide from Shapeways on preparing files for printability (source).
3D Printing for Beginners: Core Concepts You Need Before You Start

Before ordering 3d prints online, a few fundamentals will save you time and money.
File types and formats:
- STL: The most common format; stores surface geometry as triangles. Great for almost every service.
- OBJ: Includes geometry and can include color/material groups; useful for certain workflows.
- 3MF: Modern format with better metadata; supported by many services.
- Units: Check whether your file is in millimeters or inches, and be consistent. I once uploaded an enclosure in inches—the result was dollhouse-sized. Double-check scale every time (source; source).
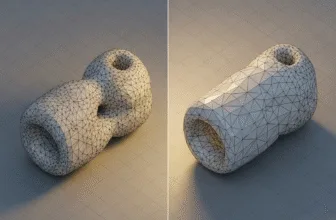
Mesh integrity:
- Use closed, watertight meshes with no holes.
- Ensure manifold edges and correct normals orientation.
- Most online 3d printing services auto-check and may auto-fix simple errors, but it’s best to repair locally first (source).
Printing technologies at a glance (and if you need a deeper dive, check out our 2025 3D printer buying guide for an FDM vs SLA breakdown):
- FDM/FFF: Melts plastic filament layer by layer. Great for budget prototypes. Common materials: PLA, PETG, ABS.
- SLA/DLP: Cures liquid resin with light. High resolution and smooth surfaces. Best for miniatures, small enclosures, and detailed models.
- SLS/MJF: Sinter nylon powder into robust parts. No support structures, great for functional parts, complex geometries, and batches.
- DMLS/SLM: Fuses metal powders. Used for aerospace/medical-grade components. Expensive but incredibly capable.
DfAM (Design for Additive Manufacturing) basics:
- Minimum wall thickness: Start with 0.8–1.0 mm for FDM; check service guidelines for each material/process.
- Overhangs: Angles greater than 45° often need supports in FDM/SLA.
- Tolerances: For assemblies, 0.2–0.5 mm clearance is typical. More for rougher processes; less for high-resolution resins.
- Hollow parts need escape holes so un-sintered powder or resin can drain in SLS/SLA.
These fundamentals come straight from reliable beginner guides and service docs (source; source).
Step 1: Get or Create a Printable 3D Model
Your first move is picking or making a model. As a beginner, start simple.
Model sources:
- Download: Browse free models on Thingiverse, Makerworld, Printables or any other website to learn by printing proven designs (source).
- CAD tools: Tinkercad is beginner-friendly; Fusion 360 is powerful for parametric designs. If you’re new, try Tinkercad’s learning tracks.
- AI/CAD assists: Some tools generate shapes from parameters or images. Still, you’ll want to check printability.
- 3D scanning: Use smartphone scanning apps for quick captures or desktop scanners for accuracy.
- Hire a designer: For complex parts, services like Upwork or Fiverr can be cost-effective.
Beginner pitfalls:
- Non-manifold edges and tiny gaps that break watertightness.
- Flipped normals causing missing faces in slicers.
- Thin features that are below minimum wall thickness.
Quick fixes:
- Run a repair in Autodesk Meshmixer or Netfabb. Most small errors can be fixed in seconds.
- Pre-upload checklist:
- Confirm file type: STL, OBJ, or 3MF.
- Run a mesh inspection. Confirm no holes or non-manifold edges.
- Check scale and units.
- Name files clearly with version and units.
These prep steps echo guidance from BCN3D and Instructables, and they’ll dramatically improve your chance of first-pass success (source; source).
Personal tip: When I design quick prototypes, I keep a “printability” layer with minimum wall thickness gauges—little bars at 1.0 mm, 1.5 mm, etc., so I can eyeball whether features are safe.
Step 2: Choose the Right Process and Material

This is where many beginners get stuck. Here’s my simple decision matrix:
- Visual prototype or aesthetics first:
- SLA resin (standard, clear, or color). Very smooth and detailed.
- Functional prototype with snaps or threads:
- SLS/MJF nylon (PA12). Durable and accurate, no supports.
- Heat resistance or outdoor use:
- ABS, ASA, or certain nylons. Good temperature and UV resistance.
- Flexible parts:
- TPU (FDM) or flexible resins.
- Biocompatibility or medical contexts:
- Specialized certified materials via bureaus with documentation.
Materials at a glance:
- FDM: PLA (easy, crisp details), PETG (tougher, slightly flexible), ABS/ASA (stronger, more heat and UV resistant).
- Flexible/durable: Nylon/PA12 (SLS/MJF), TPU.
- Resins: Standard (general use), tough (impact-resistant), clear (optical effects), castable (jewelry/metal casting).
- Advanced: Metals like aluminum or stainless steel via DMLS/SLM.
Finish options:
- Raw, polished, dyed, vapor-smoothed, painted.
- Finishes change tolerances. Polishing removes material; vapor smoothing can soften corners. Account for this in your fit-critical designs.
Choosing the right combo is the fastest path to success and is reinforced by beginner guides and service overviews (source; source).
Step 3: Upload and Instant Quoting
This is the fun part. Most platforms give you an instant quote and render.
What you’ll see:
- Upload your STL/OBJ/3MF. The system auto-checks for errors and shows a 3D preview. Some platforms suggest scale corrections if units look off (source).
- Choose your process, material, color, finish, and quantity. The price and lead time update in real time.
- Add notes for critical dimensions or orientation. I attach a quick sketch if a surface is cosmetic.
Cost and time drivers:
- Part volume and bounding box.
- Part count and whether parts can be nested (SLS/MJF).
- Layer height, infill percent (for FDM), and supports.
- Post-processing (polishing, dyeing, vapor smoothing).
- Shipping destination and speed.
Beginner money-savers:
- Combine multiple small parts into one file if the online 3d printing service allows it.
- Hollow out models with internal ribs for stiffness.
- Choose economical materials for early prototypes (PLA or standard resin).
- Batch orders to hit quantity discounts.
These steps mirror real service workflows and the auto-quoting features you’ll find on major platforms (source; source).
Step 4: Ordering 3D Prints Online
Once your config looks good, it’s time to check out.
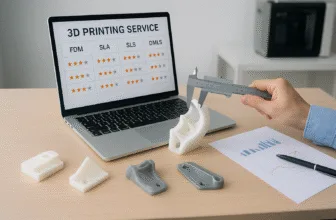
Vendor snapshot:
- Shapeways: Large material and finish catalog.
- i.materialise: Polished interface and strong material documentation.
- Hubs: Broad network of suppliers, including CNC and injection molding.
- Craftcloud: Global network of 3D printing services for competitive pricing.
- FacFox: Prototyping and end-use parts with a fast global delivery.
- in3dtec: Chiana-based service for high-precision industrial prototypes and series.
- Jawstec: 3D printing services for prototypes and production parts.
- JLCPCB: Affordable prototypes for electronics enclosures and functional parts.
- PCBWay: Low-cost 3D printing alongside their main PCB services.
- Protolabs: Rapid prototyping and on-demand production for businesses.
- Sculpteo: Online 3D printing for prototypes and series production.
- SD3D: On-demand manufacturing for prototypes and production runs.
- SGD 3D: Canadian service for rapid prototyping and production parts.
- Treatstock: Marketplace for consumers to find and purchase 3D prints.
- WhiteClouds: Custom large-scale 3D models and displays for businesses.
- Xometry: On-demand manufacturing marketplace for businesses and engineers.
NDA/IP best practices:
- If your design is sensitive, ask for an NDA before sharing files.
- Mark critical surfaces, threads, and fit areas in your order notes.
- If assembly is required, provide exploded diagrams or callouts.
Checkout essentials:
- Confirm payment methods, VAT/taxes for your country, and customs for international orders.
- Save tracking and order numbers.
- For business orders, ask support about expedited lead times or dedicated account managers.
i.Materialise has a good walkthrough of the online ordering process and what info to include in your submission.
Step 5: What Happens During Production at the Online 3D Printing Service
I used to imagine a single magic printer doing everything at once. In reality, there’s a lot of thoughtful prep.
Inside the online 3d printing service:
- Preparation: Technicians choose build orientation to balance strength and surface quality. Supports are generated for FDM/SLA. SLS/MJF parts are nested tightly to maximize efficiency.
- Scheduling: Your job enters a machine queue. Lead time depends on print duration, post-processing, and current volume.
- QA: Parts get dimensional checks, surface inspections, and any specified certifications or reports. Reputable services reprint if parts fall outside tolerances or are damaged (source).
Knowing this makes ETA updates feel a lot more predictable.
Step 6: Receiving Your Parts and Basic Post-Processing
Unboxing day is the best. But you’re not done yet.
Basic post-processing:
- Support removal: Clip and sand support marks for FDM/SLA.
- Surface prep: Wet sand from 220 to 600+ grit, then prime and paint. Resin parts can become remarkably smooth.
- Vapor smoothing (for ABS): Creates glossy, sealed surfaces. Note: this can soften edges and change dimensions.
- Dyeing: SLS nylon takes dye beautifully. Great for color coding.
Resin part handling:
- Clean in isopropyl alcohol (IPA), then fully UV cure. Always use gloves, goggles, and proper ventilation. Resin can be irritating before cured (source; source).
Hardware and assembly:
- Tap threads after printing or design for heat-set inserts in FDM/MJF. Install inserts with a soldering iron and a steady hand.
- Do a fit check. Measure critical features with calipers, test-assemble, and note any tweaks for a revision.
If something’s off, contact the online 3d printing service politely with measurements, photos, and a quick note on expectations. Many services will help you iterate.
Troubleshooting and Common Mistakes
I’ve made all of these. Here’s how to dodge them.
- Unit/scaling errors: Confirm model units on export and in the uploader. If it looks wrong in preview, it’s wrong.
- Too-thin walls and warping: Follow material-specific minimums and design with fillets, ribs, and uniform wall thickness.
- Tolerance issues: Give 0.2–0.5 mm clearance for fits. Tighten only if your process supports it.
- Material mismatch: Don’t expect PLA to behave like nylon. Match material to use case.
- Under-communicated critical dimensions: Use order notes to flag surfaces, threads, and press-fits.
If you need a reprint:
- Provide order number, photos, measurements, and the spec you expected. Stay courteous, specific, and solution-focused. Many services will reprint if there’s a clear defect (source; source).
Real-World Mini Use Cases
Here are five quick projects (and for more innovative 3D printable ideas you can tackle at home) I’ve actually done or coached friends through. Your costs will vary by vendor and location, but these ballparks help.
- Replacement clip for a backpack
- Process/Material: FDM, PLA
- Finish: Raw
- Cost/Lead time: ~$10–$20, 3–5 days
- Notes: I added fillets and 2 perimeters. It’s still going strong.
- Electronics enclosure for a sensor
- Process/Material: SLA, tough resin
- Finish: Polished and painted
- Cost/Lead time: ~$60–$120, 5–8 days
- Notes: I designed with 0.3 mm clearance for the lid. Snapped together perfectly after a light sand.
- Tabletop miniature
- Process/Material: SLA, standard resin
- Finish: Primed and hand-painted
- Cost/Lead time: ~$15–$40, 4–7 days
- Notes: The detail from SLA was night-and-day vs FDM.
- Shop jig/bracket for a drill press
- Process/Material: SLS, PA12 nylon
- Finish: Dyed black
- Cost/Lead time: ~$45–$90, 6–9 days
- Notes: Zero supports and great dimensional stability.
- Jewelry master for casting
- Process/Material: SLA, castable resin
- Finish: Raw for the foundry
- Cost/Lead time: ~$50–$150, 5–10 days
- Notes: I coordinated with the caster for sprue placement. The result was clean and crisp.
These reflect the typical pairing of material to use case you’ll see recommended in industry guides (source; source).
Budgeting and Planning

A simple framework I use:
- Early prototypes: Cheapest viable material and finish. PLA or standard resin. Optimize design before splurging.
- Functional tests: SLS/MJF nylon for strength. Consider batch printing to drop per-part cost.
- Showcase parts: SLA with premium finish. Budget extra for polish or paint.
Sample cost ranges:
- Small FDM part: $10–$30
- Small SLA part: $15–$60
- Medium SLS/MJF nylon: $45–$150
- Metals: $100–$500+
Quantity discounts: Many online 3d printing services offer tiered pricing. Ordering 10 parts instead of 1 can drop the per-unit price significantly.
Lead time expectations:
- FDM: 2–5 days
- SLA: 4–8 days
- SLS/MJF: 5–10 days
These patterns align with how services price and schedule prints through their instant-quote systems (source).
Security, Ethics, and Compliance
A quick but important note before ordering 3d prints online:
- Restricted items: Many services won’t print weapons or regulated components. Medical devices often require proof of compliance.
- Export controls: Designs with defense applications may fall under ITAR/EAR. When in doubt, consult an expert.
- IP best practices: Use NDAs and share only what’s necessary. Consider encrypting files and sending assembly notes separately.
- Food/skin contact: Only use materials with appropriate certifications and finishes. Ask the online 3d printing service for documentation.
Being proactive here protects you and your project.
Glossary for Beginners
- STL: Triangulated mesh format used for most prints.
- OBJ: Geometry format that can include color/material groups.
- 3MF: Modern format with richer metadata.
- Infill: Internal structure density in FDM parts.
- Layer height: Thickness of each printed layer ; smaller means smoother, slower, and often more expensive.
- Supports: Temporary structures that hold up overhangs.
- Post-processing: Any finishing step after printing (sanding, dyeing, coating).
- DfAM: Designing specifically for additive manufacturing constraints and strengths.
DfAM Checklist
Here are the checklists I keep pinned above my desk.
Pre-upload DfAM checklist:
- Units confirmed (mm vs inches)
- Minimum wall thickness checked
- Escape holes for hollow parts
- Overhang angles and supports considered
- Tolerances noted in a drawing
- Mesh repaired and watertight
Order notes template:
- Critical dimensions with callouts
- Surface finish priorities (e.g., “Top face cosmetic”)
- Thread specs and fits
- Orientation preferences, if any
- Assembly diagram link
Tolerance cheat sheet (starting points):
- FDM: 0.3–0.5 mm clearance
- SLA: 0.2–0.3 mm clearance
- SLS/MJF: 0.2–0.5 mm clearance
If you’re learning CAD, I like Autodesk’s Fusion 360 for personal use for parametric modeling. It’s a strong path forward after Tinkercad.
FAQs
- What file formats do online 3d printing service platforms accept? Commonly STL, OBJ, and 3MF. STL is the safest default. Always check the platform’s list.
- How do I choose between SLA and SLS as a beginner? SLA for small, detailed, cosmetic parts. SLS for durable, functional parts without supports.
- What is an online 3d printing service vs a marketplace? An online 3d printing service directly provides printing services and QA. A marketplace may connect you to a network of suppliers. Some platforms are hybrids (source).
- Can I order 3d prints online without CAD skills? Yes. Start with pre-made models from repositories like Makerworld or hire a designer. Learn CAD gradually via tutorials.
- How accurate will my part be and what tolerances should I design for? Expect 0.1–0.3 mm accuracy for SLA and SLS, and a bit wider for FDM. Design 0.2–0.5 mm clearance unless your vendor provides tighter specs.
For deeper prep tips, I recommend the Shapeways file prep tutorial and i.Materialise’s ordering guide (source).
If you’re hungry for more 3d printing for beginners tutorials, subscribe—I share practical DfAM tricks, finish hacks, and case studies every week.
Sources and Helpful Links
- Instructables: Using Online 3D Printing Services (source)
- BCN3D: The Beginner’s Guide to 3D Printing (source)
- Shapeways: How to Prepare Your File for 3D Printing (source)
- Thingiverse: About (source)
And because learning never stops, here’s another great resource for newbies: Tinkercad’s beginner lessons.