Estimated reading time: 18 minutes
Key Takeaways
- Functional 3D prints prioritize real-world utility by focusing on material strength, print settings, and post-processing techniques.
- Choosing the right filament—PETG for most household items, ASA for outdoor use, ABS for automotive interiors, TPU for flexibility, and PC/Nylon for high-strength—is critical to part longevity.
- Design best practices like correct layer orientation, 4–6 perimeters, and heat-set inserts dramatically improve durability and performance.
- From household organizers to automotive clips, printing your own parts saves money, reduces waste, and delivers custom fits impossible to buy off the shelf.
- Always respect safety boundaries: avoid food contact, life-safety loads, and high-heat zones unless you use certified materials and processes.
Table of Contents
- What Are Functional 3D Printing Projects?
- Getting Started with Functional 3D Printing Projects
- Household 3D Prints
- 3D Printed Tools
- Replacement Parts 3D Printing
- Custom Brackets 3D Printing
- Automotive 3D Printing
- Home Improvement 3D Prints
- Garden 3D Printing Projects
- Workshop 3D Printed Organizers
- Phone Accessories 3D Printing
- Cost, Time, and Eco Benefits
- Safety and Limitations
- Troubleshooting Tips for Functional Prints
- Get Started with Your Own Functional Prints
- Functional 3D Printing Projects – FAQs
- Conclusion: Transform Your Everyday with Functional 3D Printing Projects
The Ultimate Guide to Functional 3D Printing Projects: Practical Prints for Home, Garden, and Workshop
What Are Functional 3D Printing Projects?
When people ask me why I’m obsessed with functional 3D printing projects, I tell them it’s simple: these prints solve real problems. They’re not shelf decor. They’re parts I use daily—3D printed tools, adapters, brackets, and replacement parts 3D printing that save me money and time.
By definition, functional 3D printing projects are designed for strength, durability, custom fit, and real-world utility (source). Formlabs puts it perfectly: functional parts are “objects built for tangible utility rather than decoration” (source). That’s my north star. If it doesn’t make life easier, it doesn’t make the cut.
And the trend is exploding. Utility-focused collections like cable combs, replacement parts, and organizers dominate community galleries and curated libraries (source). My own print queue is full of everyday fixes: hooks, adapters, phone mounts, car clips—the kind of stuff you notice only when it works.
What makes a 3D print “functional”? Three things:
- Daily usability: The object serves a clear purpose in everyday life, whether it’s a tool, organizer, or household item that makes tasks easier.
- Problem-solving: It replaces a missing or broken part that’s hard to find in stores or online, extending the life of something you already own.
- Value creation: It helps you save money by reducing the need to buy new products, offering a low-cost, customized alternative instead.
In this guide, I’ll go deep into categories I rely on: household 3D prints; 3D printed tools; replacement parts 3D printing; custom brackets 3D printing; automotive 3D printing; home improvement 3D prints; garden 3D printing projects; workshop 3D printed organizers; and phone accessories 3D printing. I’ve printed every category here—some multiple times—and I’ll share the exact settings I use and where I messed up so you don’t have to. If you need additional inspiration beyond this post, my larger roundup of 25+ proven functional 3D printing projects is a great starting point.
Getting Started with Functional 3D Printing Projects
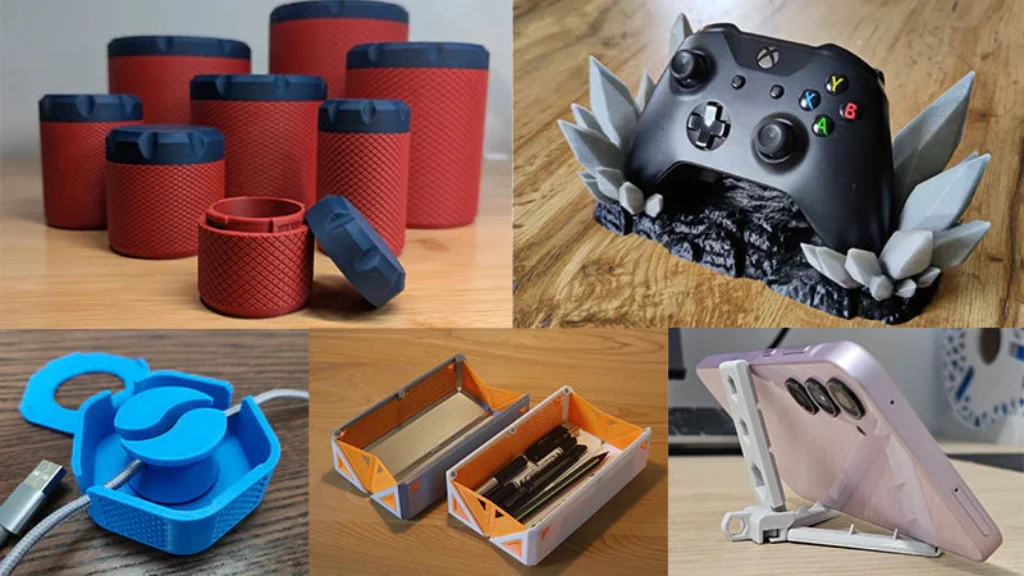
Before you dive into your first batch of functional 3D printing projects, nail your materials and settings. I learned this the hard way after a PLA bracket sagged in my sunny kitchen.
Materials overview:
- PLA: Great for prototypes and indoor low-stress parts. Easy to print, low warping.
- PETG: My default for household parts. Tough, slightly flexible, handles moderate heat and moisture (source).
- ABS/ASA: Better for automotive and outdoor use. Heat and UV resistance, especially ASA (source).
- Nylon/Polycarbonate (PC): High-strength, impact resistant. Use for demanding parts (source).
- TPU: Flexible. Perfect for clips, feet, seals, and vibration damping.
Design-for-function best practices:
- Orient layers to align with load paths. Avoid tension across layers.
- Use 4–6 perimeters for load-bearing parts.
- Choose 30–50% gyroid or cubic infill for strong cores.
- Add 6–10 top/bottom layers for durability.
- Fillet and chamfer corners to reduce stress risers.
- Tolerances: holes ±0.2 mm; slots ±0.5 mm. Test coupons help.
Durability upgrades:
- Heat-set threaded inserts are magic for repeat assembly. I use M3/M5 often. Learn more about inserts here: threaded inserts for plastics.
- Add metal rods or dowels to reinforce long parts.
- Use epoxy or cyanoacrylate to bond multi-part assemblies.
Safety boundaries I respect:
- No direct food contact unless you use approved coatings and workflows.
- Avoid structural, life-safety, or mains electrical parts.
- Be cautious with high-heat zones: engine bays often exceed 80 °C.
- For UV, water, or chemical exposure, choose appropriate materials or coatings (source).
Pro tip: Start with PETG for most prints. It’s forgiving and strong. I keep a checklist of my go-to settings taped to my printer. If you’re still deciding on hardware, skim our 3D printer buying guide before pulling the trigger.
Household 3D Prints
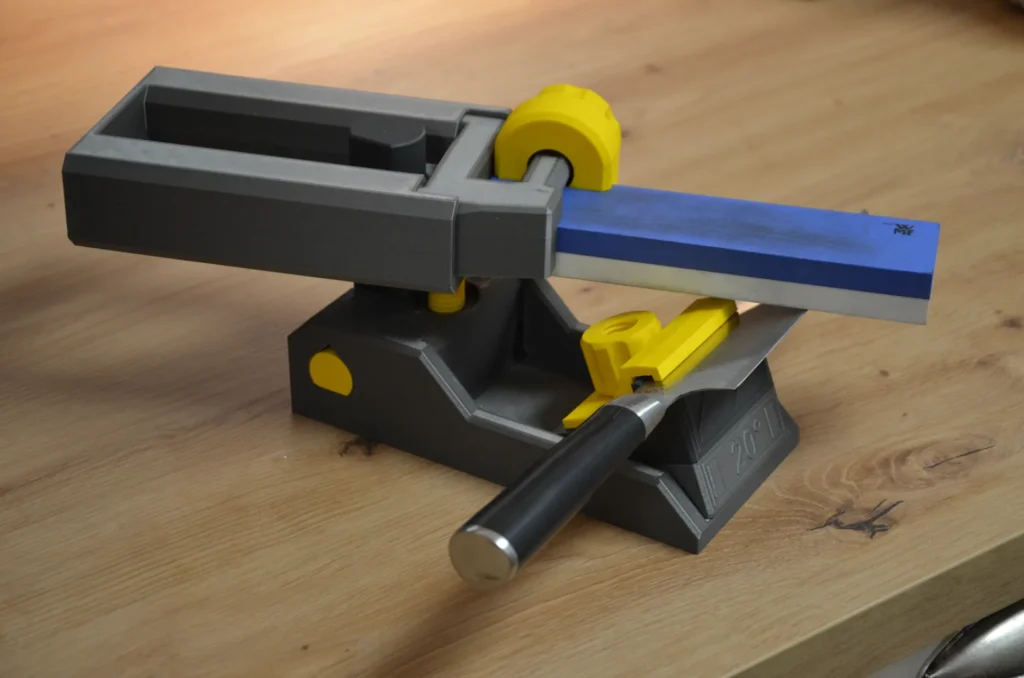
Mini guide: PETG recommended; 0.2 mm layer; 4 perimeters; 40% gyroid infill; bed 60 °C; nozzle 230 °C. Orient parts to counteract bending forces. Keep walls ≥2 mm. Hardware I keep handy: M3 screws, 5×1 mm magnets.
Projects:
- Cable combs & under-desk cable clips — Tames cord chaos; PETG; 0.2 mm, 4 perim, 40% gyroid, 230/60 C; Easy; size slots to cable OD; 45–90 min.
- Retractable bag clip & chip clamp set — Seals bags tight; PETG; 0.2 mm, 3 perim, 30% infill, 230/60 C; Easy; add logo text; 30–50 min each.
- Over-door wall hooks — Instant hanging space; PETG; 0.2 mm, 5 perim, 50% infill; Medium; match door thickness ±0.2 mm; 2–3 hrs.
- Drawer dividers & utensil organizers — Custom fit storage; PETG; 0.2 mm, 3 perim, 20% infill; Easy; parametric width; 1–2 hrs.
- Light switch guards & child-proof outlet covers — Prevents accidental flips; PETG; 0.2 mm, 4 perim, 40% infill; Easy; add magnet pockets; 45–75 min.
- Doorstop wedges — Grippy and tough; TPU or PETG; 0.2 mm, 4 perim, 30% infill; Easy; tune angle for gap; 40–60 min.
- Vacuum hose-to-tool adapter — Adapts odd diameters; PETG; 0.2 mm, 5 perim, 30% infill; Medium; print with vase test to dial fit; 1–2 hrs.
My “aha!” moment: a custom vacuum adapter that finally fit a weird sander port. Five minutes of CAD. One hour of printing. Workshop dust under control.
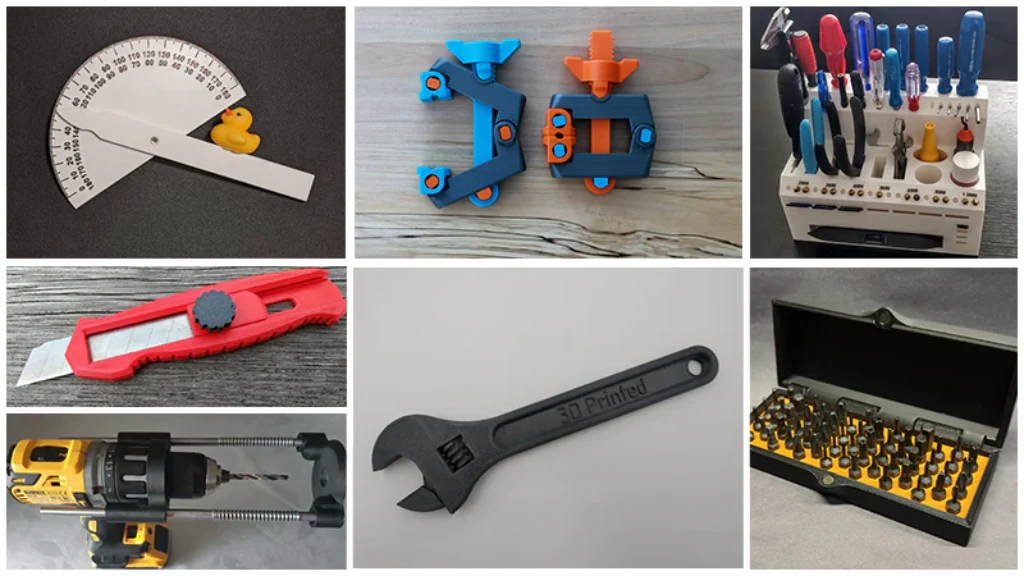
3D Printed Tools
Mini guide: PLA or PETG; 0.15 mm for precision (remember to dial retraction—our Retraction 101 guide can help you eliminate stringing on tight-tolerance tools); 5 perimeters; 50% infill. Orient handles parallel to layers for strength. Hardware: springs, M5 heat-set inserts, bolts.
Projects:
- Hex-bit holders — Organize drivers; PLA/PETG; 0.15 mm, 4 perim, 25% infill; Easy; chamfer holes; 40–60 min.
- Spring clamp — Handy extra hands; PETG; 0.2 mm, 6 perim, 50% infill; Medium; use a metal spring pin; 2–3 hrs.
- Corner clamp — Squaring small frames; PETG; 0.15 mm, 6 perim, 50% infill; Medium; add M5 inserts; 2–4 hrs.
- Sanding block with replaceables — Even sanding; PETG; 0.2 mm, 4 perim, 30% infill; Easy; fit to 1/4 sheet; 1–2 hrs.
- Drill guide/jig — Straight drilling; PETG; 0.15 mm, 6 perim, 60% infill; Medium; press-fit metal bushings; 2–3 hrs.
- Angle & feeler gauge set — Quick checks; PLA; 0.15 mm, 3 perim, 20% infill; Easy; label with embossed text; 1–2 hrs.
- Caulk tube key — Roll and squeeze; PETG; 0.2 mm, 4 perim, 40% infill; Easy; add knurling; 30–45 min.
I’ve printed three corner clamps in PETG with M5 inserts. They’re my go-to for picture frames and cabinet face frames.
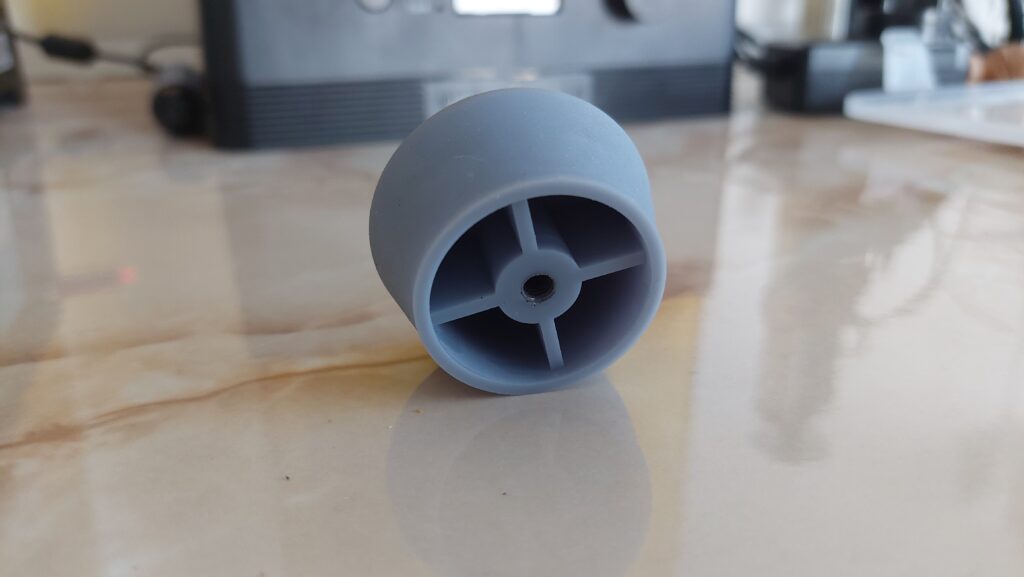
Replacement Parts 3D Printing
Mini guide: PETG/ABS; 0.2 mm; 6 perimeters; 30% infill; ensure watertight shells where needed. Measure original parts with calipers. Hardware: O-rings, M4 screws, custom pins.
Projects:
- Dishwasher rack clip — Saves buying a whole rack; PETG; 0.2 mm, 6 perim, 40% infill; Medium; test heat; 1–2 hrs.
- Appliance knob — Replace broken dials; PETG/ABS; 0.2 mm, 5 perim, 30% infill; Medium; model D-shaft; 1 hr.
- Curtain rod end cap — Stops rattles; PETG; 0.2 mm, 4 perim, 20% infill; Easy; match OD/ID; 30–45 min.
- Window latch tab — Restore function; ASA/ABS; 0.2 mm, 6 perim, 40% infill; Medium; acetone smooth; 1–2 hrs.
- Pegboard hooks — Custom lengths; PETG; 0.2 mm, 5 perim, 50% infill; Easy; tweak peg spacing; 45–60 min.
- Furniture foot glides — Protect floors; TPU/PETG; 0.2 mm, 3 perim, 20% infill; Easy; interference fit +0.2 mm; 30–50 min.
This category has saved me the most money. A single dishwasher clip print beat a $55 dealer part.
Custom Brackets 3D Printing
Mini guide: ASA or PC; 0.2 mm; 6 perimeters; 40% infill. Include vent slots for electronics. Use parametric OpenSCAD models for adjustable dimensions. Hardware: level bubble; M6 T-nuts.
Projects:
- L-bracket — Universal mount; ASA/PC; 0.2 mm, 6 perim, 50% infill; Medium; add fillets; 1–2 hrs.
- Modem/router wall-mount — Free desk space; ASA; 0.2 mm, 5 perim, 40% infill; Medium; vent slots + zip tie channels; 2–3 hrs.
- Cable management brackets — Route wires; PETG/ASA; 0.2 mm, 4 perim, 30% infill; Easy; magnet or screw mounts; 1–2 hrs.
- Camera/webcam mount — Stable and clean; ASA/PC; 0.2 mm, 6 perim, 40% infill; Medium; add 1/4″-20 insert; 2–3 hrs.
- Shelf support bracket — Strong utility shelf; PC; 0.2 mm, 6 perim, 50% infill; Hard; pilot holes, metal screws; 3–5 hrs.
I use a parametric L-bracket template. Change two variables, hit print, done. It beats rummaging for store-bought brackets that almost fit.
Automotive 3D Printing
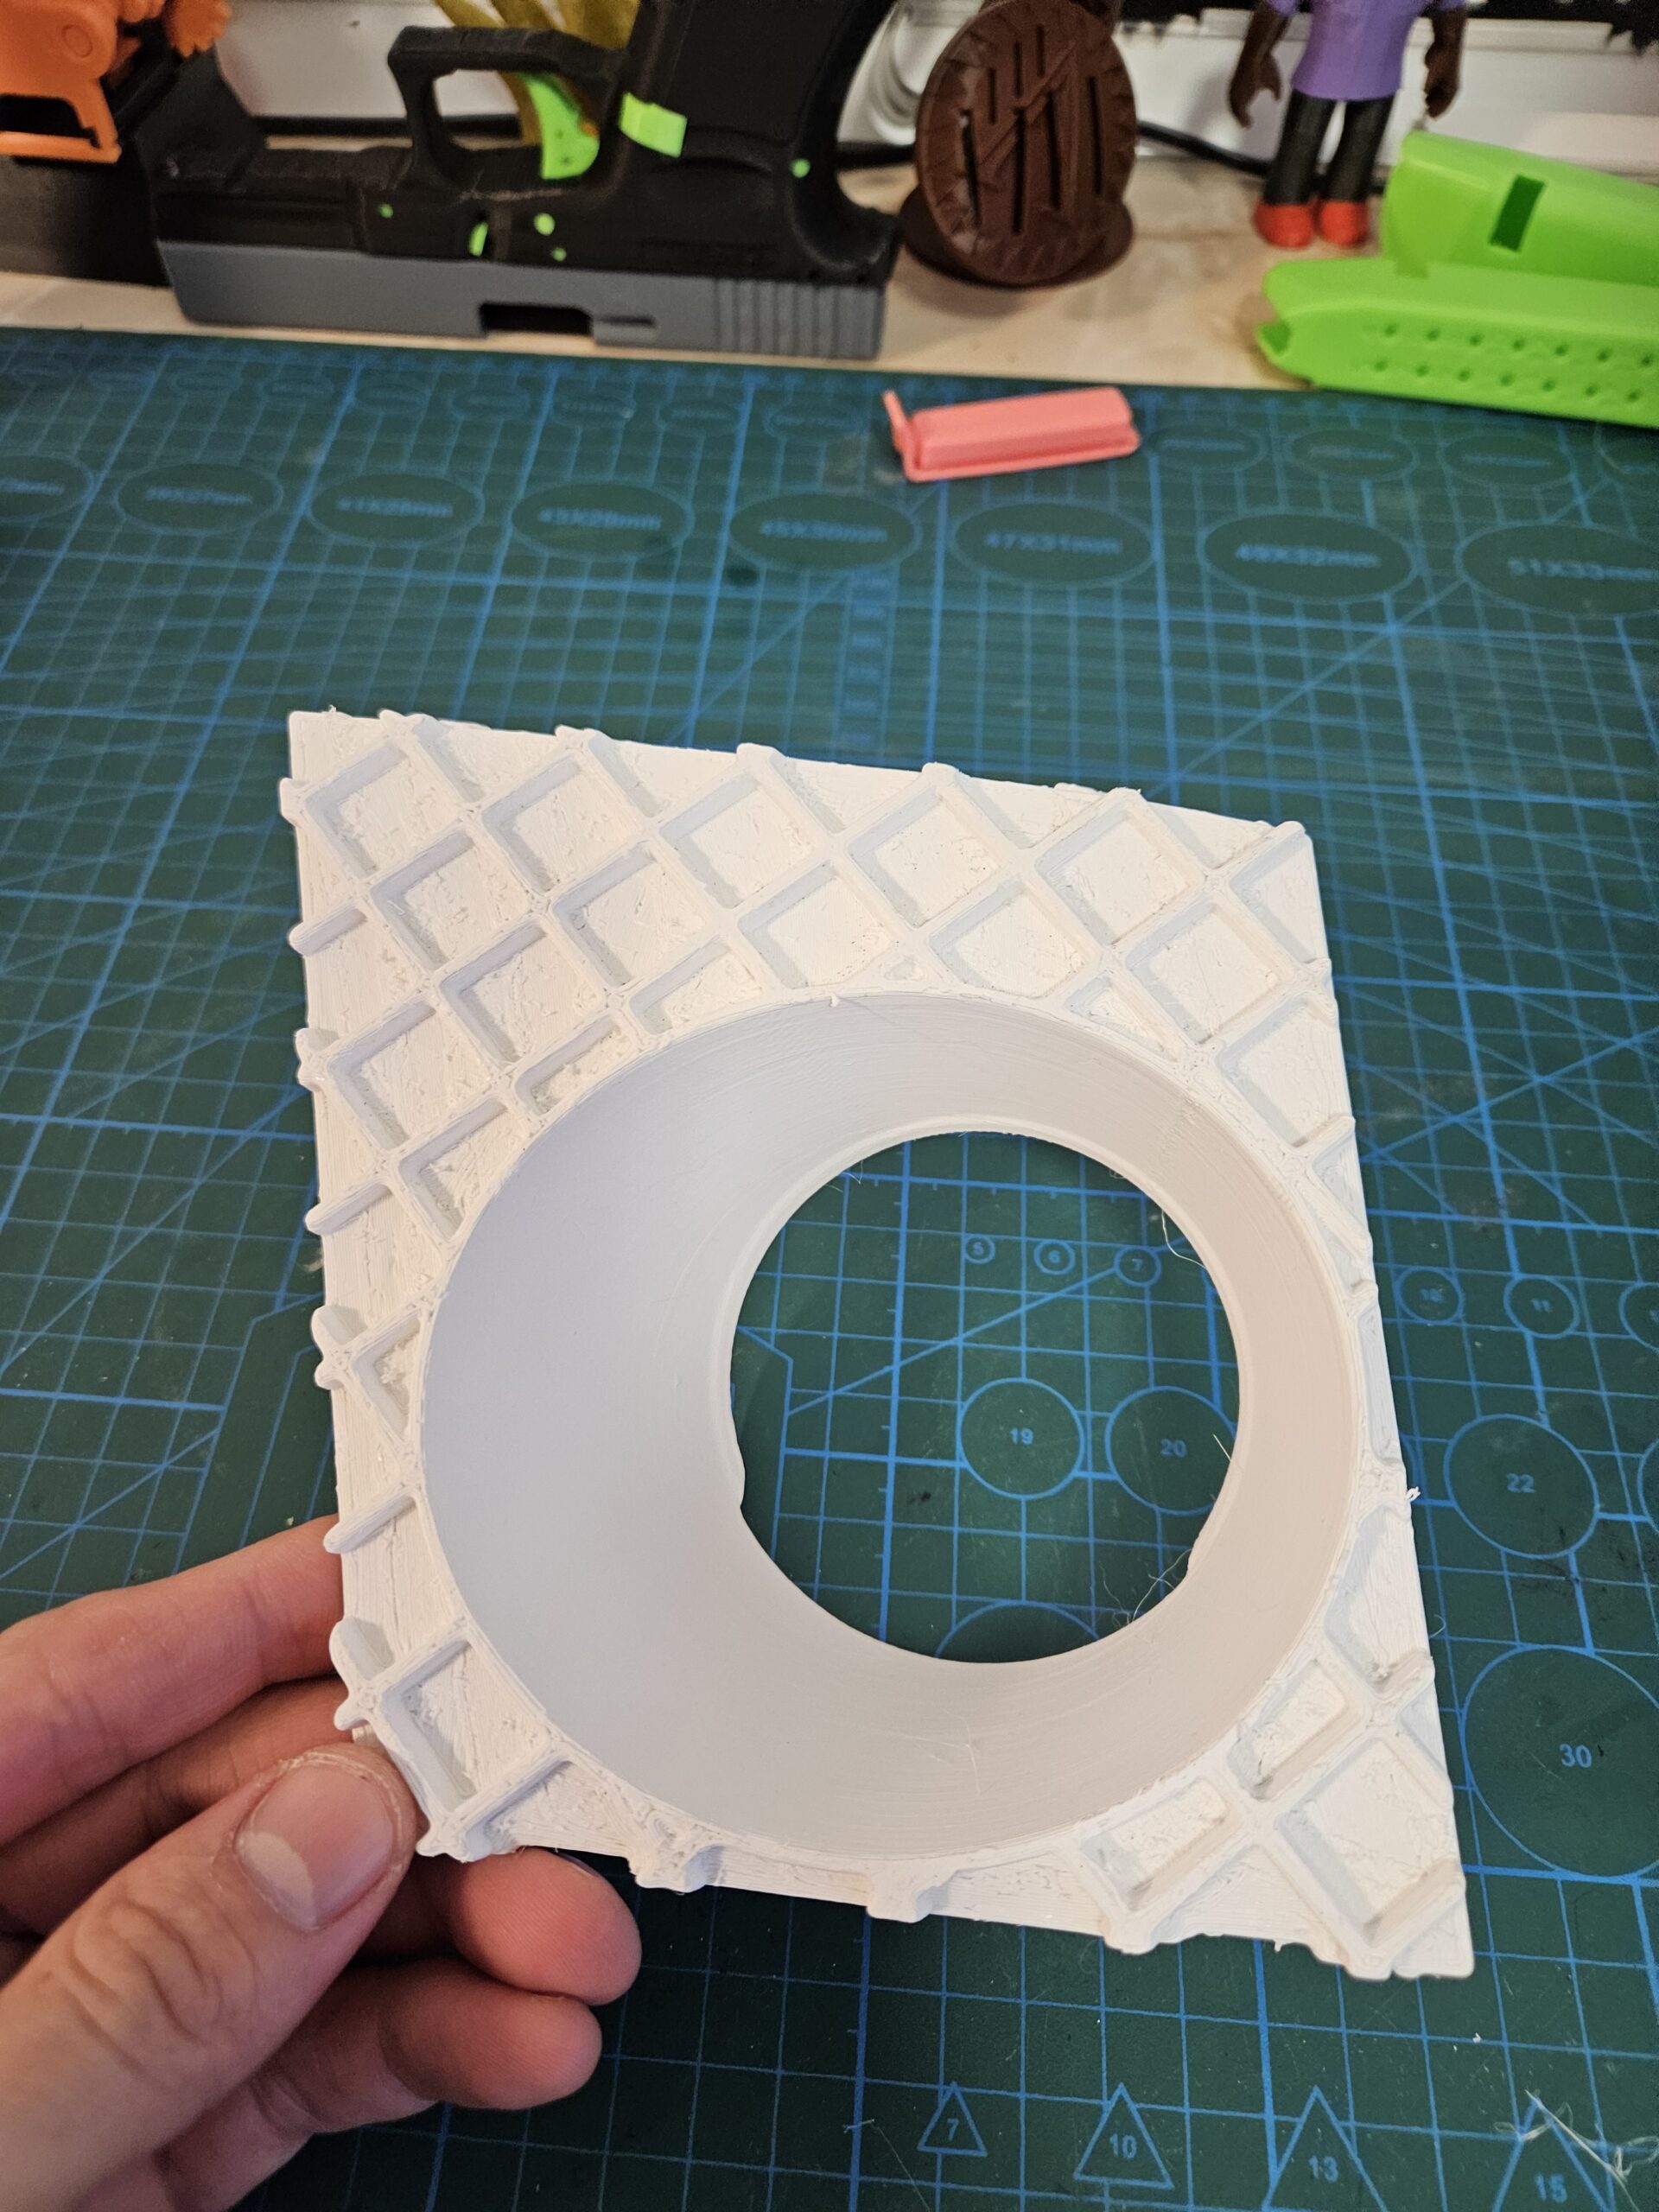
Mini guide: ASA for UV; ABS for interiors. 0.2 mm; 6 perimeters; 50% infill. Enclosure recommended. Post-process ABS with acetone vapor for smoother surfaces. Hardware: O-ring grooves, metal clips.
Projects:
- Trim clip replacement — Stop rattles; ASA; 0.2 mm, 6 perim, 50% infill; Medium; print multiple; 30–60 min each.
- Cupholder expander — Fits big bottles; ASA/ABS; 0.2 mm, 5 perim, 40% infill; Medium; add TPU liner; 2–3 hrs.
- Key fob shell — Fresh housing; ABS; 0.15 mm, 4 perim, 30% infill; Medium; capture OEM PCB; 1–2 hrs.
- Remote holder clip — Sun visor snap; ASA; 0.2 mm, 5 perim, 40% infill; Medium; spring arms thickness 2.5–3 mm; 1–2 hrs.
- Jack pad puck — Protect pinch welds; PETG/TPU; 0.2 mm, 6 perim, 50% infill; Medium; match jack recess; 2 hrs.
- Vent phone mount insert — Clean, custom fit; ASA; 0.2 mm, 6 perim, 40% infill; Medium; add M3 heat-set; 2–3 hrs.
- Valve stem caps — Personalize wheels; ASA; 0.2 mm, 3 perim, 20% infill; Easy; knurl edges; 30–45 min set.
Note: Avoid engine-bay parts unless you truly understand temperatures and materials. Many areas exceed 80 °C.
Home Improvement 3D Prints
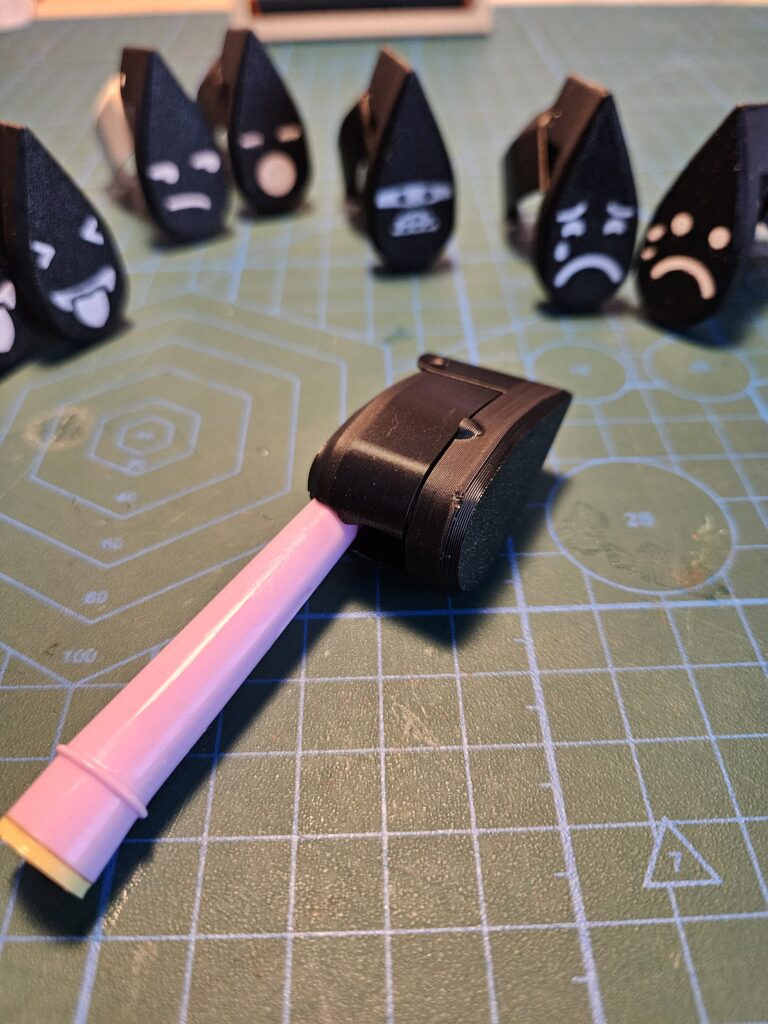
Mini guide: PETG for durability; 0.3 mm for speed; 5 perimeters; 40% infill. Orient so shear loads follow layer lines. Hardware: drywall anchors, wood screws.
Projects:
- Tile spacers — Precise gaps; PETG; 0.2 mm, 3 perim, 20% infill; Easy; color-code sizes; 30–60 min set.
- Outlet/spacer plates — Fix proud boxes; PETG; 0.3 mm, 4 perim, 30% infill; Easy; add countersinks; 45–90 min.
- Hinge shims — Perfect door gaps; PETG; 0.2 mm, 4 perim, 20% infill; Easy; 0.5–2 mm thickness; 30–45 min set.
- Duct/hosing adapters — Match odd sizes; PETG; 0.2 mm, 5 perim, 40% infill; Medium; add hose barbs; 1–3 hrs.
- Paint can pour spout — No drip pours; PETG; 0.2 mm, 4 perim, 30% infill; Easy; gasket lip; 1 hr.
- Cable raceway elbows — Clean corners; PETG; 0.2 mm, 4 perim, 30% infill; Medium; snap-fit tabs; 1–2 hrs.
I printed hinge shims during a weekend door upgrade. They saved me three trips back to the truck.
Garden 3D Printing Projects
Mini guide: ASA or PETG for UV. 0.2 mm; 6 perimeters; 30% infill. Seal with clear UV coat for longevity. Hardware: drip line barbs, stainless hooks.
Projects:
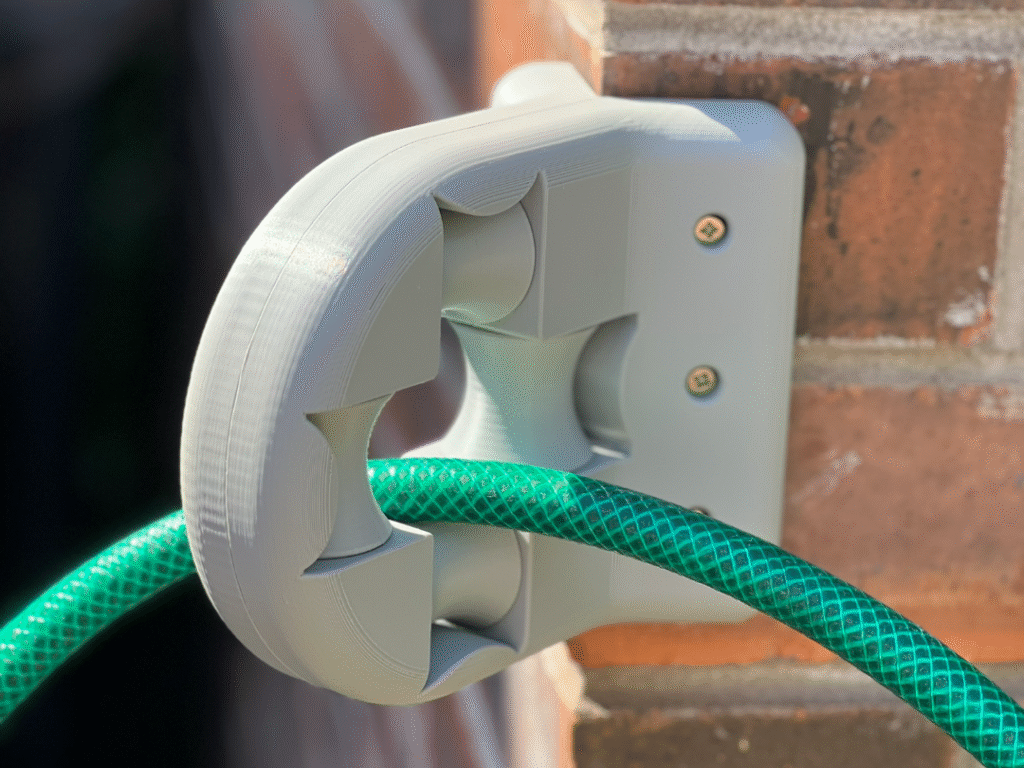
- Hose guides — Protect beds; PETG/ASA; 0.2 mm, 5 perim, 40% infill; Medium; metal stake insert; 1–2 hrs.
- Drip emitters — Custom flow; PETG; 0.2 mm, 6 perim, 30% infill; Medium; test flow rates; 45–90 min set.
- Plant label stakes — Indestructible tags; PETG; 0.2 mm, 3 perim, 20% infill; Easy; emboss names; 30–60 min batch.
- Trellis clips — Tie-free support; PETG/TPU; 0.2 mm, 4 perim, 30% infill; Easy; size by stem OD; 45–60 min.
- Sprinkler key — Valve access; PETG/ASA; 0.2 mm, 5 perim, 50% infill; Easy; add lanyard hole; 30–45 min.
- Seedling trays — Custom cells; PETG; 0.2 mm, 4 perim, 30% infill; Medium; snap-together grid; 2–4 hrs.
- Shed tool hangers — Order your rakes; PETG/ASA; 0.2 mm, 6 perim, 40% infill; Medium; screw mounts; 1–2 hrs each.
I leave PETG plant labels out year-round. A quick wipe and they still read like day one.
Workshop 3D Printed Organizers
Mini guide: PETG; 0.2 mm; 4 perimeters; 50% infill. Design parametric trays in Onshape or OpenSCAD for quick size tweaks. Hardware: drawer slides, label inserts.
Projects:
- Stackable bins — Modular storage; PETG; 0.2 mm, 4 perim, 30% infill; Easy; dovetail or lip; 2–3 hrs each.
- Screw/nut organizers — Never lose M3s; PETG; 0.2 mm, 3 perim, 20% infill; Easy; label cavities; 1–2 hrs.
- Drill bit index — Holes that fit; PETG; 0.15 mm, 4 perim, 30% infill; Medium; counterbore; 1–2 hrs.
- French cleat system — Flexible wall storage; PETG/PC; 0.2 mm, 6 perim, 50% infill; Medium; add metal screws; 2–4 hrs per holder.
- Caliper holster — Protect precision; PETG; 0.2 mm, 4 perim, 30% infill; Easy; felt pads inside; 1–2 hrs.
- Filament spool holder — Smooth feed; PETG; 0.2 mm, 5 perim, 30% infill; Medium; 608 bearings; 2–3 hrs.
- Nozzle caddy — Sort by size; PLA/PETG; 0.15 mm, 3 perim, 20% infill; Easy; engrave 0.2/0.4/0.6; 45–60 min.
I love a good French cleat system. Infinite remixing. Infinite organization.
Phone Accessories 3D Printing
Mini guide: PLA/TPU; 0.15 mm; 3 perimeters; 20% infill. Orient for cable strain relief. Hardware: MagSafe-compatible magnets, rubber pads.
Projects:
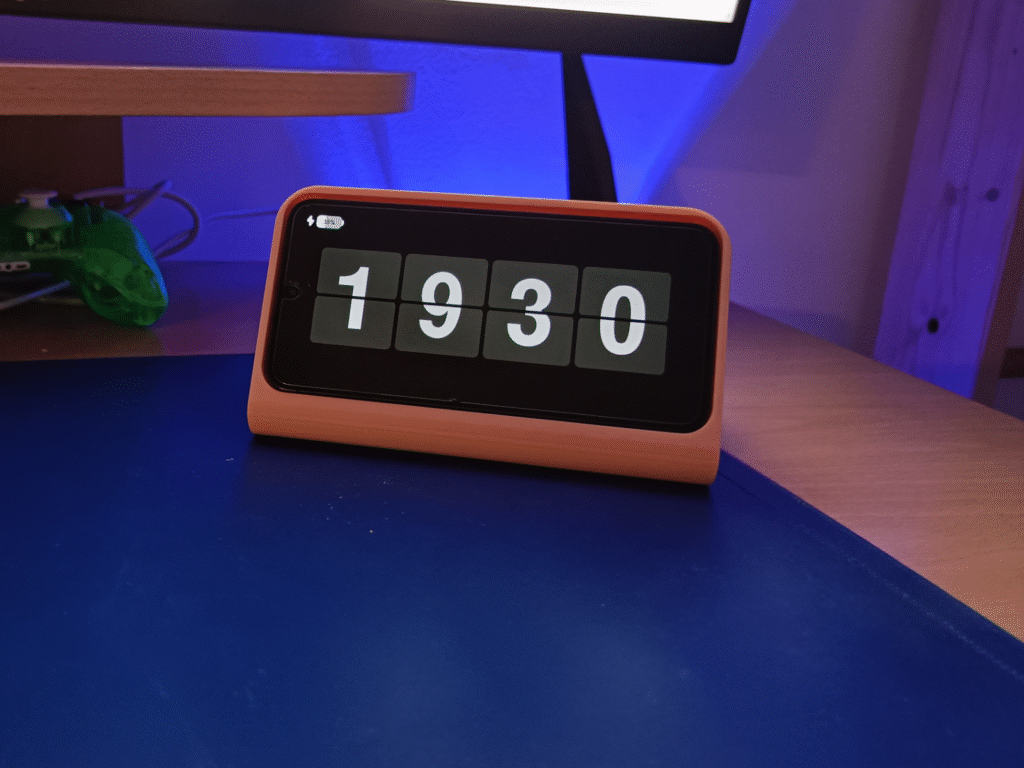
- Charging dock — Clean desk power; PLA/PETG; 0.15 mm, 4 perim, 30% infill; Medium; cable channel; 2–3 hrs.
- MagSafe stand — One-hand pickup; PETG; 0.2 mm, 5 perim, 40% infill; Medium; magnet pocket; 2–3 hrs.
- Cable saver sleeves — Protect ends; TPU; 0.2 mm, 3 perim, 10% infill; Easy; spiral wrap; 30–45 min set.
- Wall-mounted shelf — Nightstand alternative; PETG; 0.2 mm, 5 perim, 40% infill; Medium; screw anchors; 2–3 hrs.
- Tripod mount — 1/4″-20 insert; PETG; 0.2 mm, 5 perim, 40% infill; Medium; cold shoe option; 1–2 hrs.
- Car vent mount — Low-profile; ASA; 0.2 mm, 6 perim, 40% infill; Medium; tune clip thickness; 1–2 hrs.
- Multi-device organizer — Dock for all; PETG; 0.2 mm, 4 perim, 30% infill; Medium; parametric slots; 3–5 hrs.
Hot tip: Add thin TPU pads under phone stands to stop desk creep.
Cost, Time, and Eco Benefits
Here’s what I’ve tracked across dozens of functional 3D printing projects:
- Print times range from 30 minutes to 6 hours for most parts.
- Filament usage runs 10–200 g per print.
- Cost per print is often $0.20–$4.00, depending on size and material.
Compare that to store prices—$6 for chip clips, $15 for cable trays, $30+ for adapters—and it adds up fast. Plus, I print on-demand, avoid shipping, and waste less plastic by making precisely what I need. Utility prints are the best ROI in my hobby.
Safety and Limitations
Functional 3D printing projects are powerful, but there are limits:
- Don’t print structural or life-safety parts.
- Avoid mains electrical components and enclosures unless you know compliance requirements.
- No direct food contact unless you follow approved, documented workflows and coatings.
- Watch temperatures. Many engine bay parts exceed 80 °C. ASA, PC, or metals are safer.
- For UV, water, or chemical exposure, pick materials or coatings designed for the environment (source).
When in doubt, overbuild or switch to a more suitable material. A small upgrade in perimeters or a heat-set insert can be the difference between failure and “forever.”
Troubleshooting Tips for Functional Prints
I keep this quick list taped above my printer for all functional 3D printing projects:
- Strength issues: Increase perimeters to 5–6. Reorient layers with load. Switch to PETG, ASA, or PC.
- Fit issues: Calibrate your extruder steps per mm. Print tolerance tests. Compensate holes by +0.2 mm.
- Warping/adhesion: Increase bed temp to 60–80 °C. Use an enclosure for ABS/ASA. Add brims and adhesives.
- Threaded fasteners pulling out: Use heat-set inserts or through-bolts with washers.
- Squeaks/creaks in moving parts: Add a 0.2–0.3 mm clearance. Dry PTFE lube helps.
For deeper engineering background, I also keep a link handy on stress concentrators and fillets from helpful engineering references.
Get Started with Your Own Functional Prints
Ready to build your first batch of functional 3D printing projects?
- Grab my starter checklist: materials (PLA, PETG, ASA, TPU), inserts, magnets, screws, O-rings, calipers.
- Use the baseline settings in each category. Then tweak by part.
- Download or create parametric starter files in OpenSCAD or Onshape for brackets, bins, and adapters.
- Share your remixes and print settings in the comments. I’ll spotlight the clever ones.
- Subscribe for monthly project drops. I release new organizers, fixtures, and repair parts every month.
This week’s challenge: pick one print from each category. Customize it to your dimension. Watch your home transform.
Functional 3D Printing Projects – FAQs
- What filament is best for functional 3D printing projects?
PETG is my default for household, ASA for outdoor/UV, ABS for automotive interiors, TPU for flexible parts, and PC/Nylon for high-strength. - Are 3D printed tools strong enough for real work?
Yes, within reason. Use 5–6 perimeters, 40–60% infill, correct orientation, and inserts. Avoid impact or torque loads beyond plastic’s limits. - How do I size replacement parts 3D printing accurately?
Measure with calipers, model with ±0.2 mm tolerance on holes, print test coupons, and iterate once before final. - When to use custom brackets 3D printing vs metal brackets?
Print for custom geometry, low loads, and convenience. Choose metal for high heat, high load, or safety-critical mounts. - What materials/settings suit automotive 3D printing interiors?
ABS or ASA at 0.2 mm, 6 perimeters, 50% infill. Consider acetone smoothing for ABS and UV resistance with ASA. - Which home improvement 3D prints save time on renovations?
Hinge shims, outlet spacer plates, duct adapters, and tile spacers. They solve weird, real-world fit problems fast. - How to weatherproof garden 3D printing projects?
Use ASA or PETG, 6 perimeters, 30–40% infill. Seal with a clear UV coat. Prefer stainless hardware. - Must-make workshop 3D printed organizers for small shops?
Stackable bins, drill bit indexes, French cleat holders, and screw organizers. They scale with your space. - Best phone accessories 3D printing designs to avoid heat issues?
Use PETG stands with TPU feet. Provide airflow gaps. Avoid dark PLA in sunlit windowsills.
Conclusion: Transform Your Everyday with Functional 3D Printing Projects
Functional 3D printing projects changed how I look at problems. Now, when something breaks, I see an opportunity. A bracket that fits perfectly. A tool that just works. A storage solution made for my space.
Start small. Print a vacuum adapter, a hinge shim, a hose guide, and a caliper holster. Customize them for your life. Then keep going—household 3D prints, 3D printed tools, replacement parts 3D printing, custom brackets 3D printing, automotive 3D printing, home improvement 3D prints, garden 3D printing projects, workshop 3D printed organizers, and phone accessories 3D printing. There’s a solution in every category.
I’d love to feature your best designs and settings in a future update. Drop your remixes in the comments, and let’s keep pushing what “functional” can do—one practical print at a time.
Citations:
– Sinterit – Introduction and examples of 3D printing applications (source)
– Formlabs – Unexpected use cases and functional framing (source)
– Bambu Lab – Utility-focused inspiration and collections (source)
